• Menu
  • Skip to content

ss_site_title

Just another WordPress site

Archives for June 2019

Plant an Edible Front Yard Garden: Top Foods Your HOA Won’t Recognize

June 26, 2019 //  by jessica.m.ricco@gmail.com//  Leave a Comment

Planting edibles in the front yard is challenging for many of us because of overbearing HOA rules and regulations. However, there is a way to grow food in your front yard without attracting unnecessary attention. Whether you have rock or grass, chances are you have a little border or space to grow food. There is a vast array of edible and medicinal flowers that you could easily grow without any questions being raised. If you have the space for small shrubs and bushes, we’ve also provided some attractive, inconspicuous options.

Flowers
Calendula

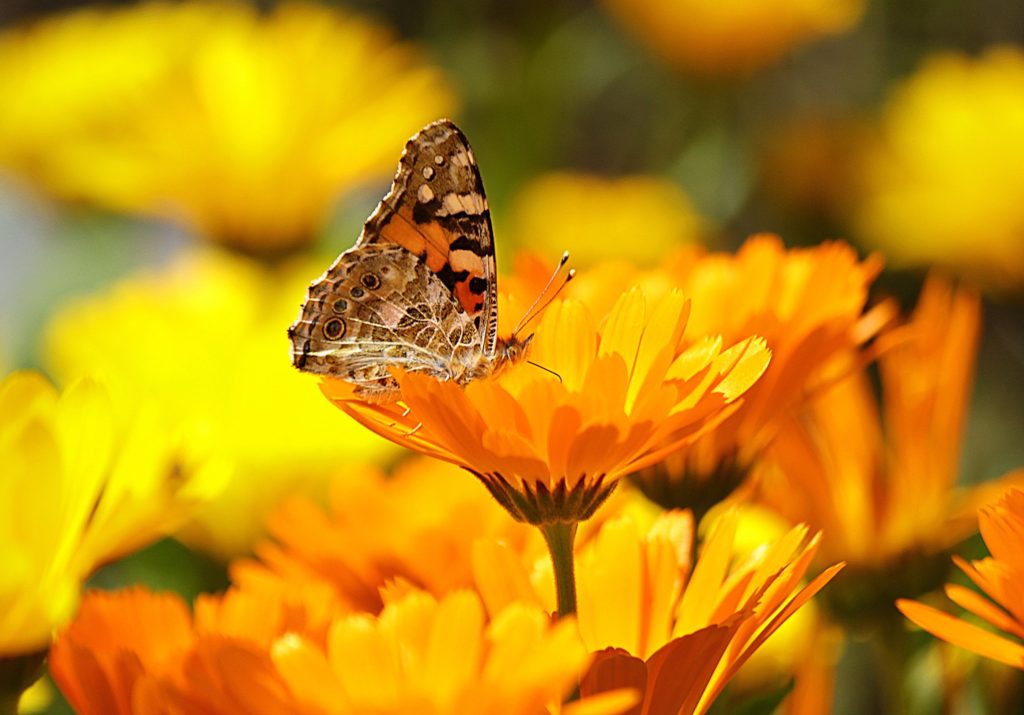
Top of my list is calendula. There are so many uses for this cheery little flower, from teas, to oils, sprinkling the petals on eggs, or salads.
nodding onion

Nodding Onion

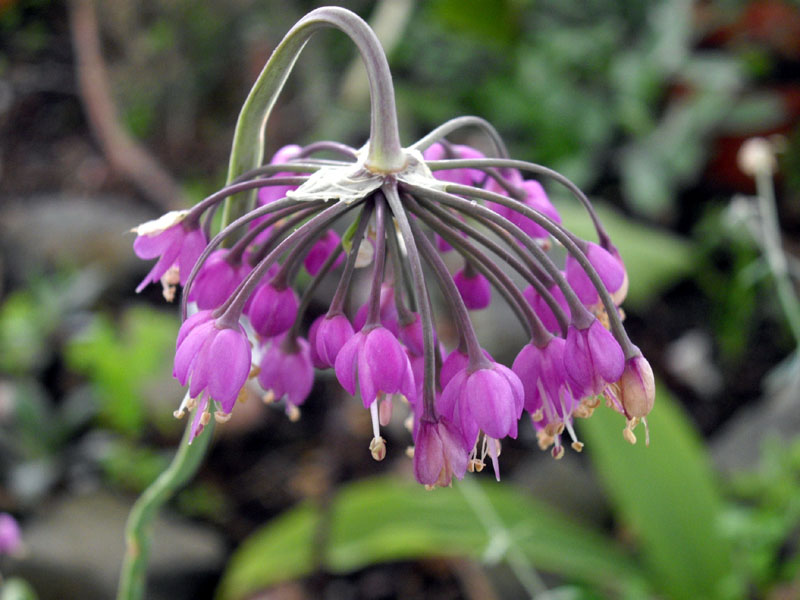
I would probably interspace calendula with nodding onion, an unusual and really pretty onion that is great for green onions and forms gorgeous purple flowers on droopy heads. The orange and purple combination is wonderful.

Image credit: ghislain118  [CC BY-SA 3.0]
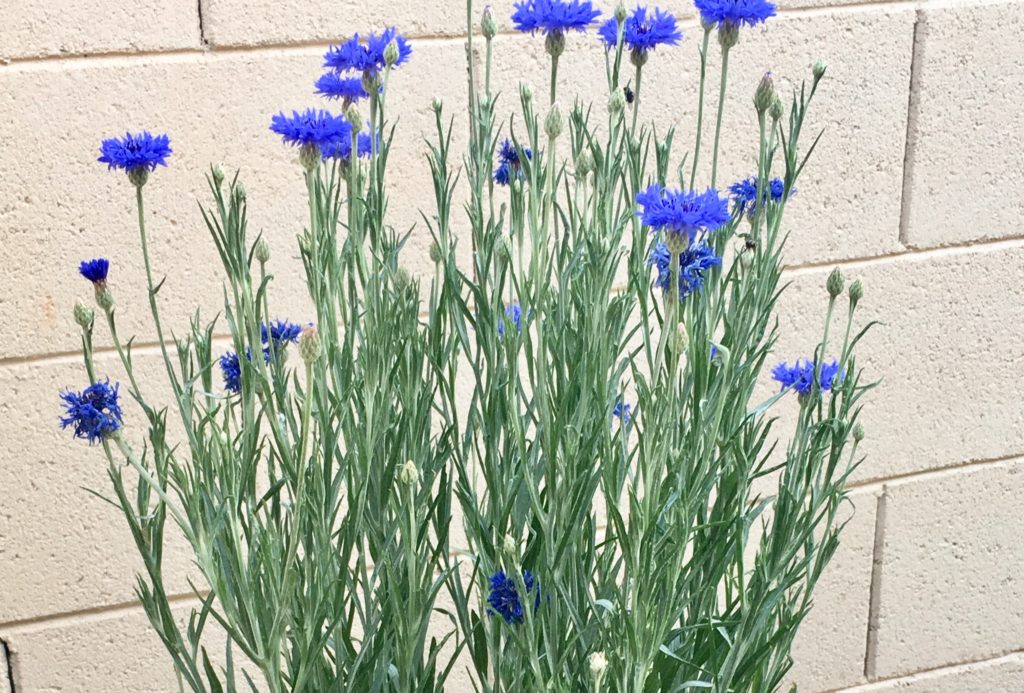
bachelor's buttons

Bachelor Buttons

Calendula and nodding onion are also very striking with blue bachelor buttons, another edible flower.  These are good to plant early fall and should give some color through winter and into spring, but will die off when the hot summer temperatures arrive.
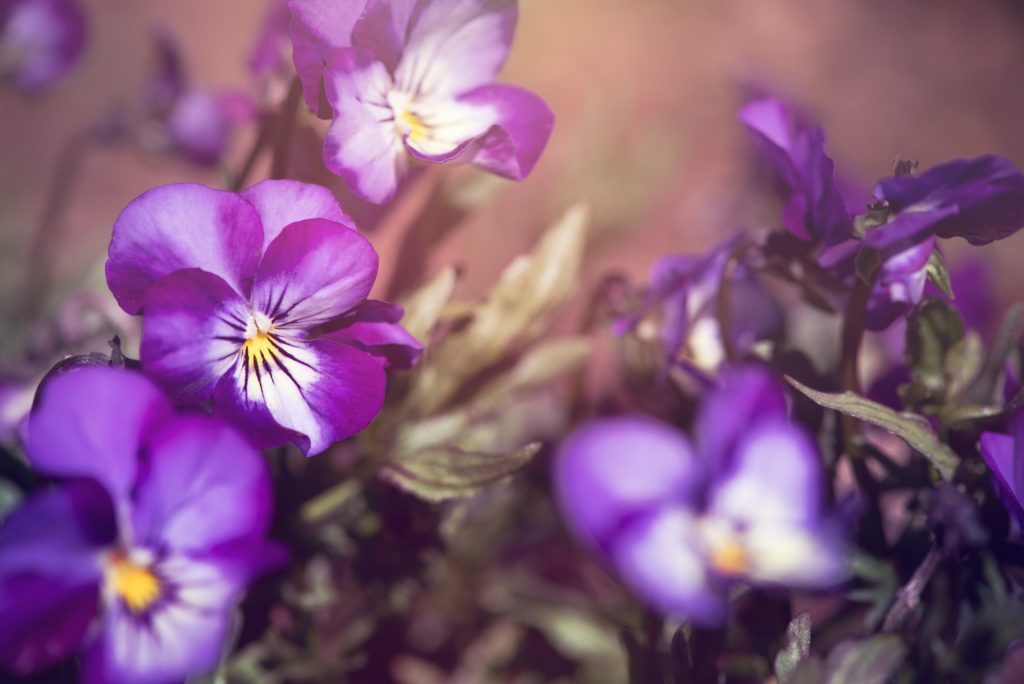
Violets

The violet family is another fantastic option, Violets, Johnny jump-ups, pansies are all edible flowers and their leaves can also be added to salads and sandwiches or sugared and used to decorate baked goods.
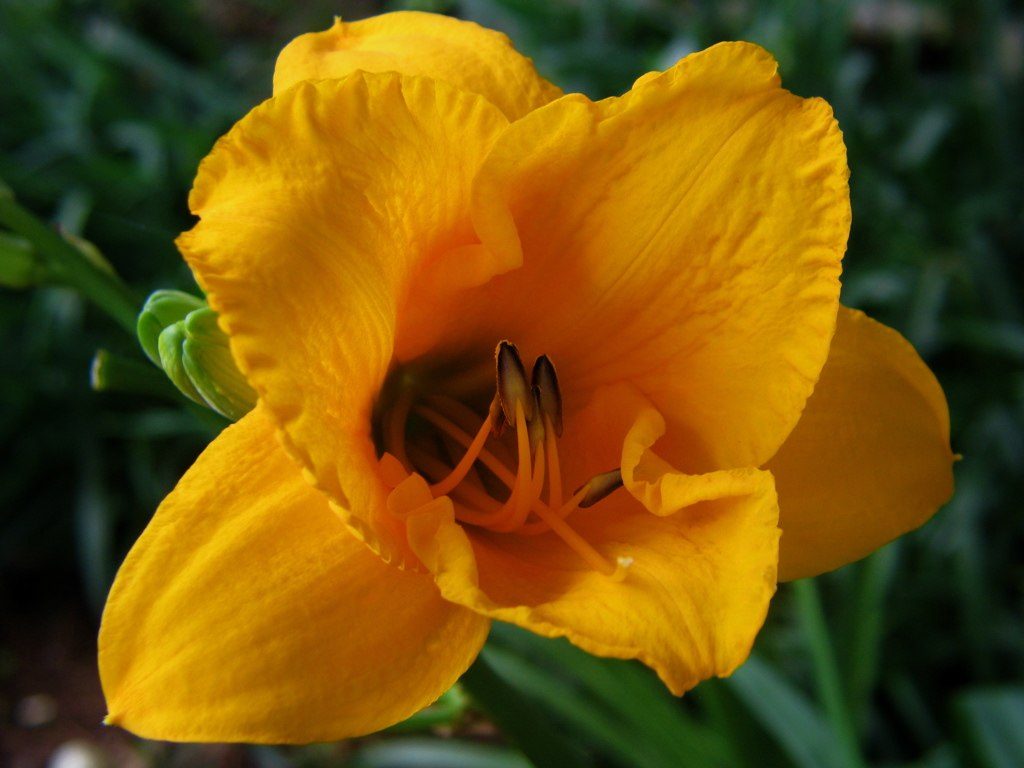
Day Lillies

Day-lilies bloom around April. They are edible flowers, delicious battered and fried.

Photo credit: Audrey  [CC BY 2.0]
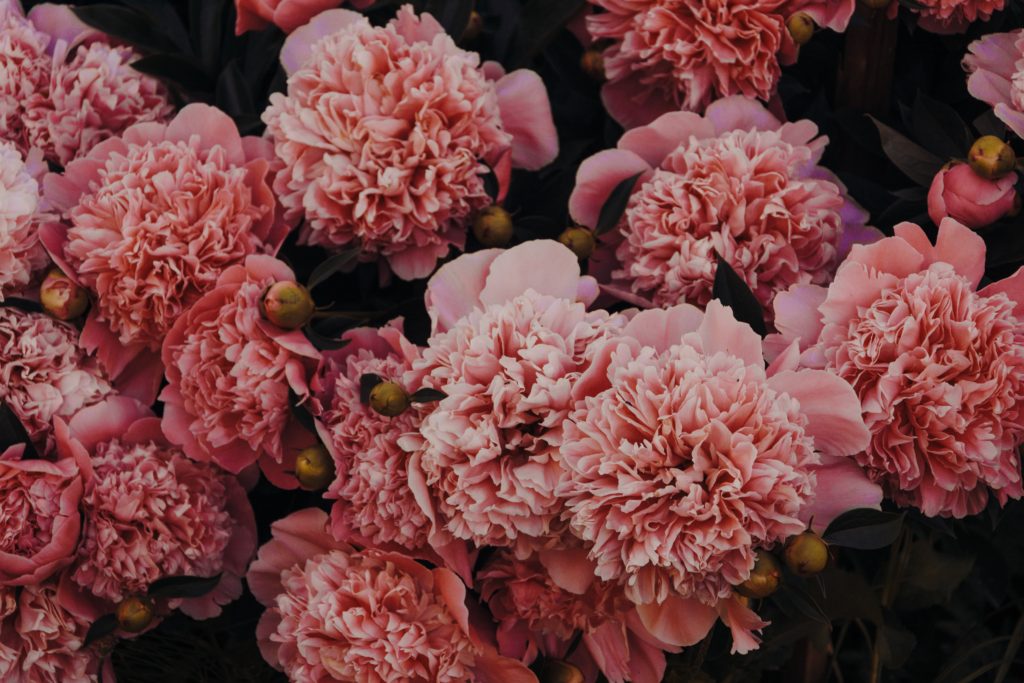
Carnations

Carnations or the dianthus family is one of my favorites to grow. I love the heady smell of heirloom varieties and they add interest sprinkled on salads.
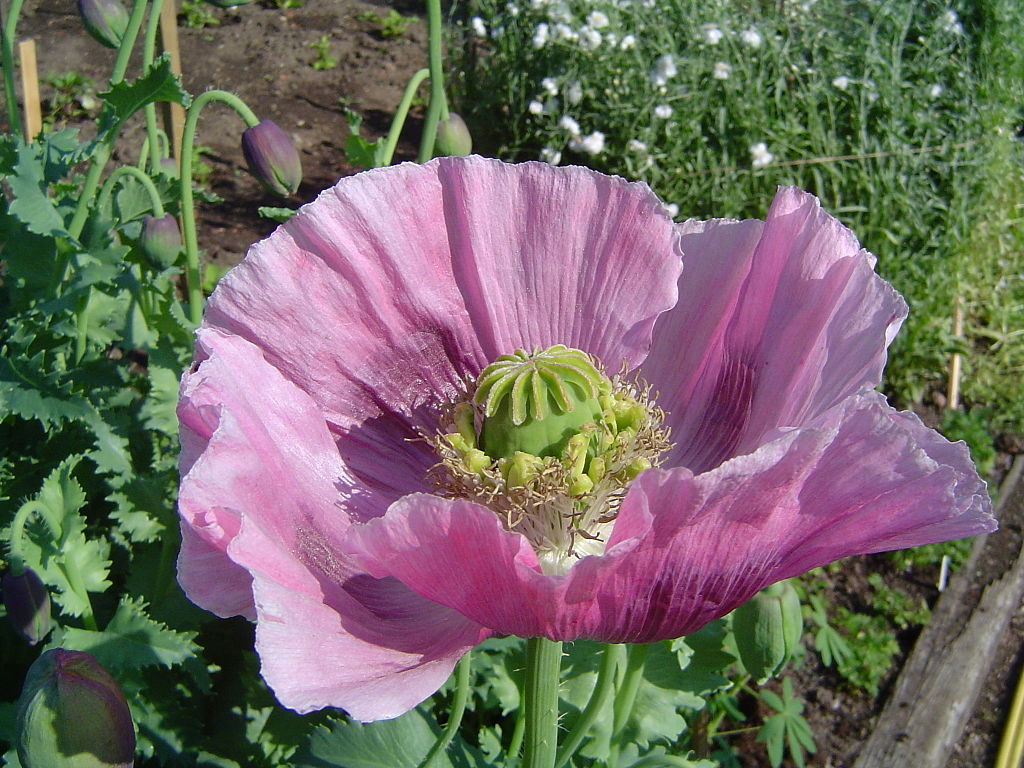
Bread Seed Poppies

Bread seed poppies sown in the fall will bring a gorgeous display in the spring and the ornament seeds head can be collected in summer. The seeds can be used in breads and other baked goods.

Image credit: Louise Joly, one half of AtelierJoly [CC BY-SA 1.0]
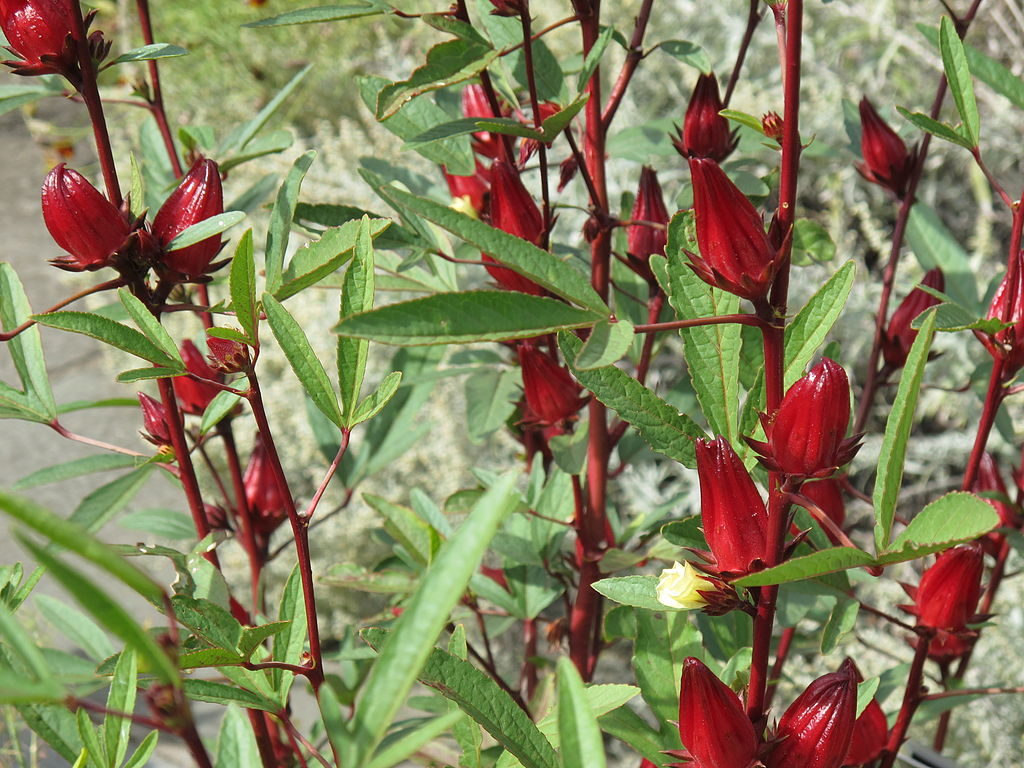
Roselle

In the hibiscus family there is lovely roselle. Roselle is very high in Vitamin C and can be used in teas or other beverages. Roselle jam is an absolute delight.

Image credit: Invertzoo [CC BY-SA 4.0]
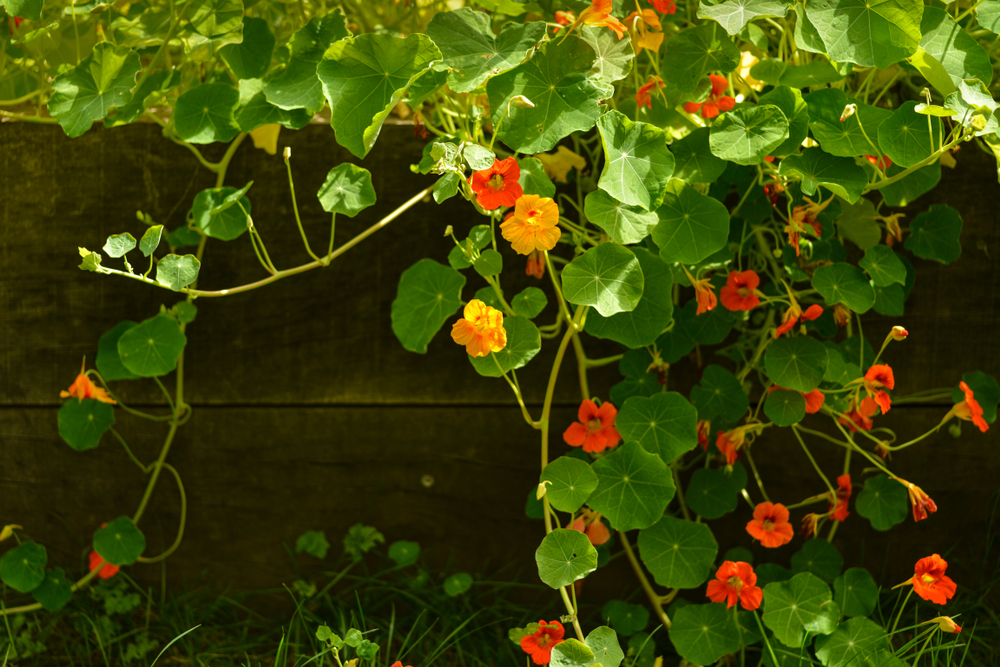
Nasturtiums

We would be remiss not to mention nasturtiums, which offer tons of showy flowers. Leaves, flowers, and berries on this one are all edible.

Herbs
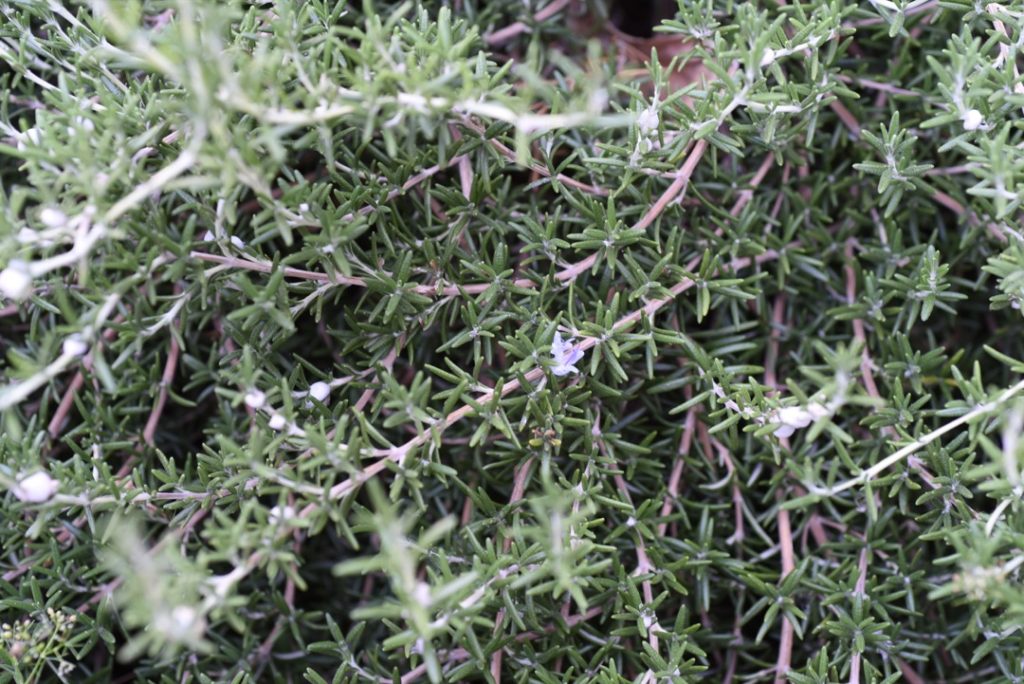
rosemary

Rosemary

One prominent herb in desert front yards is rosemary. Rosemary varieties do taste different, so plant a variety of rosemary you will enjoy added to your foods.
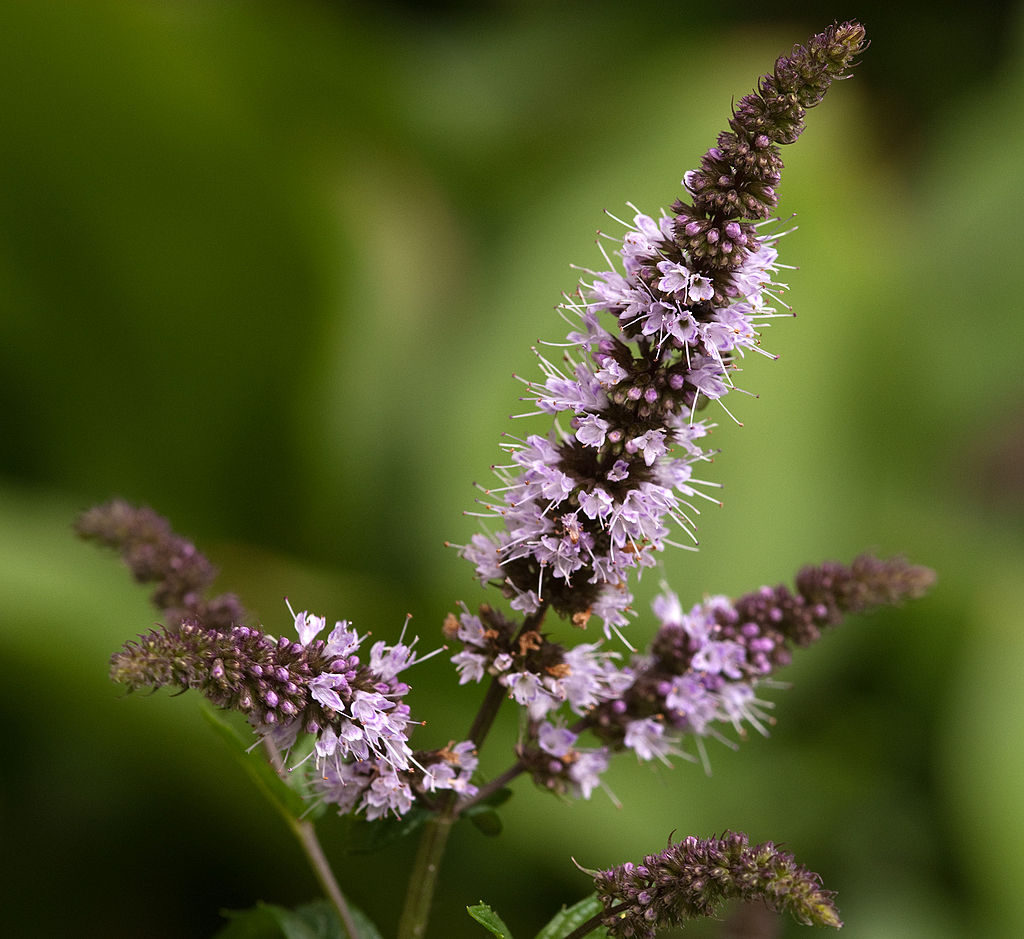
peppermint

Peppermint

A small peppermint bush is a great addition, with lots of flowers and lovely for a cup of peppermint tea.

Photo credit: Dinnye [CC BY-SA 3.0]
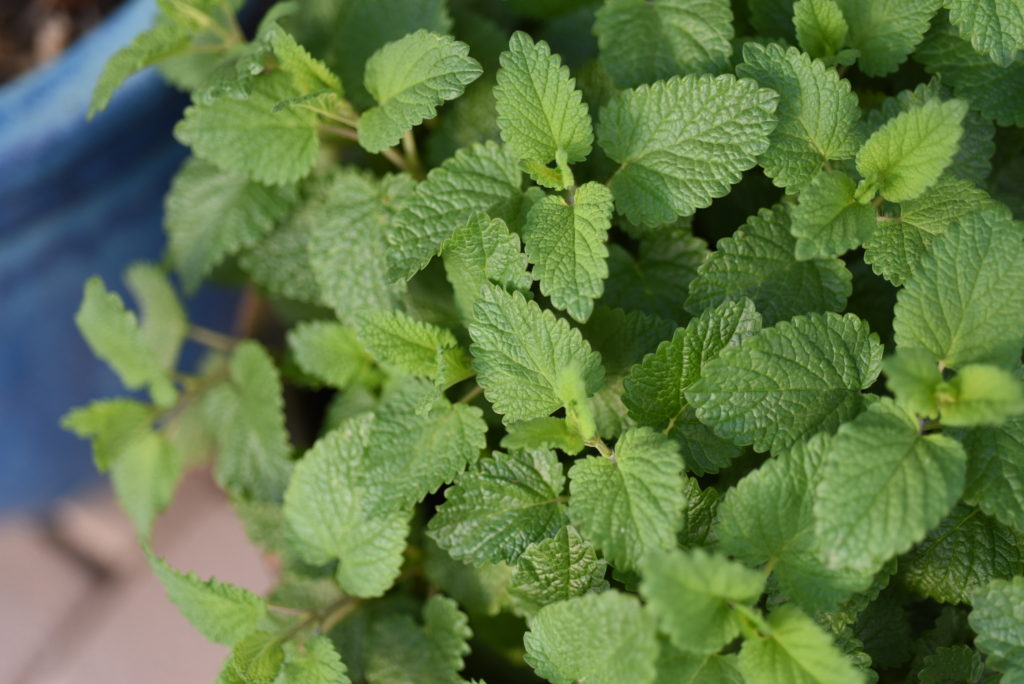
lemon balm

Lemon Balm

Lemon balm is one of my favorite herbs and this will also not be easily detected by your HOA. This herb has many medicinal uses from soothing anxiety to digestive upset and is easy to brew in a tea. 
Borage

Borage

Borage in early spring, with its large leaves and brilliant blue star shaped flowers, adds color and a refreshing cucumber flavor to Springtime lemonades and teas.
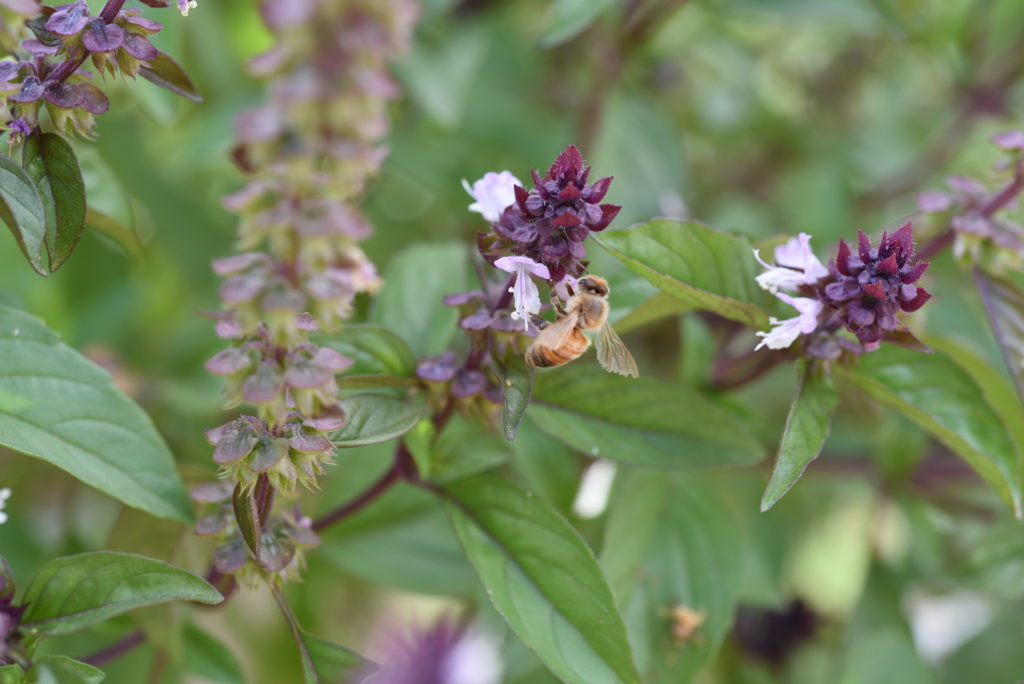
Basil

Lesser known basils such as Thai or holy basil attract pollinators and offer benefits in teas or infused waters.
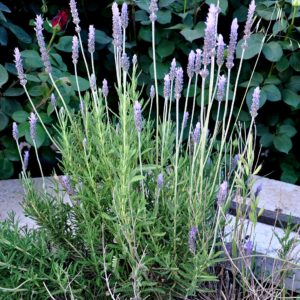
Lavandula_angustifolia_Lavender

Lavender

No one questions lavender or the salvia varieties, both loved by pollinators and hummingbirds alike.

Photo credit: Lazaregagnidze [CC BY-SA 4.0]

Shrubs and Bushes
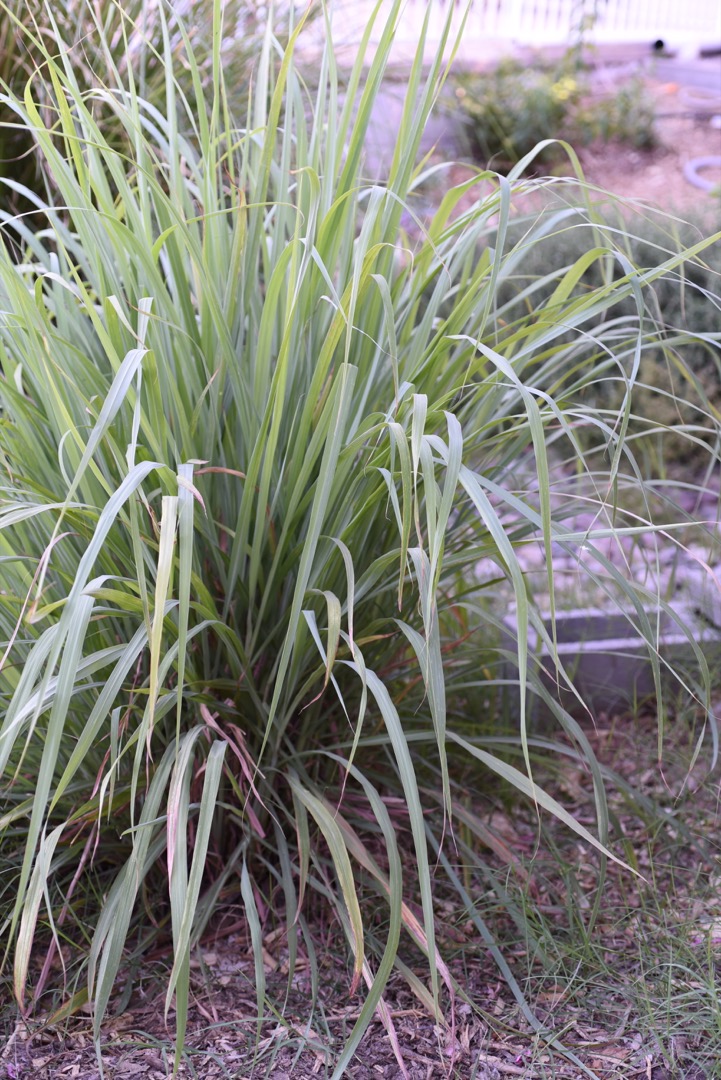
lemongrass

Lemongrass

If you are able to add shrubs to your landscape, consider Lemongrass. Lemongrass is a zesty way to flavor a variety of marinades and Asian dishes and a wonderful tea component. The long, flowing leaves are beautiful.
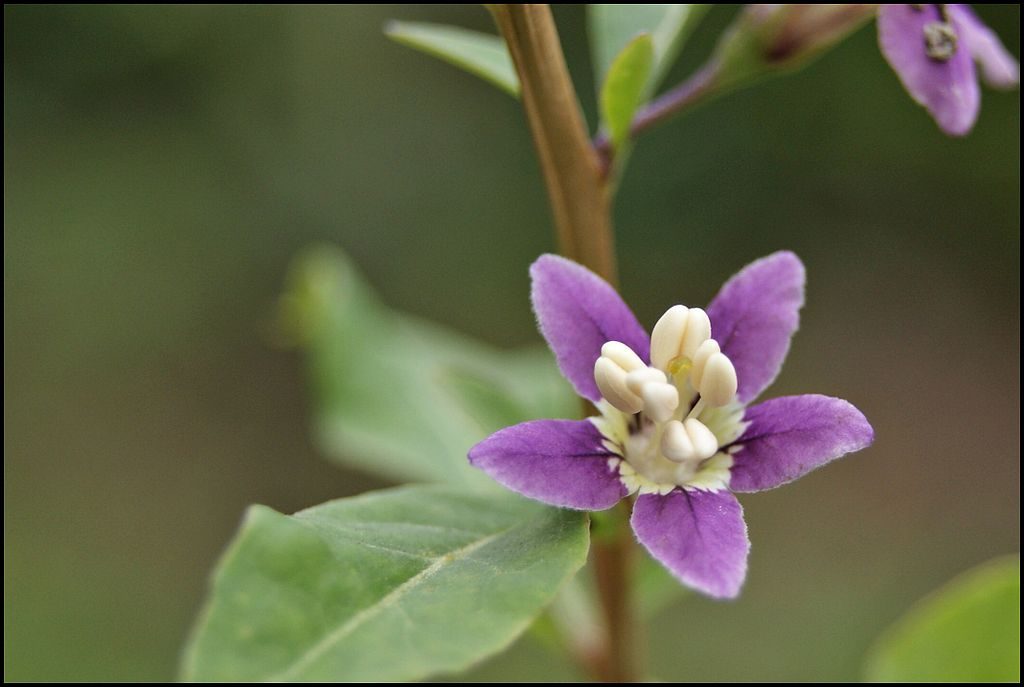
Wolfberry

The native wolfberry is a member of the goji berry family. It is extremely drought tolerant and produces edible berries that are very high in antioxidants. Goji berries are not the best tasting for fresh eating but are a really healthy addition to smoothies and breakfast cereals.

Photo credit: Danny S. [CC BY-SA 3.0]
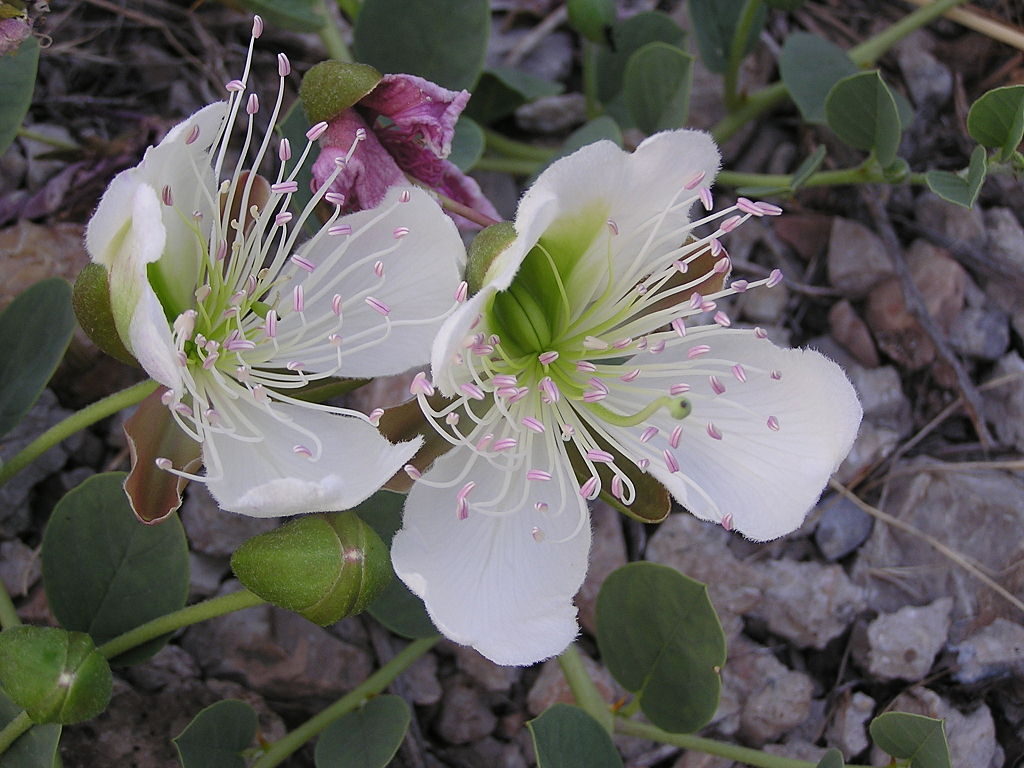
Caper Berries

The caper bush is an unusual plant to try and newer to Arizona. Caper bush loves the heat, is drought tolerant, and looks very much like a boxwood variety shrub. It produces gorgeous showy flowers, which, if not picked will become giant caper berries. Both the buds and the berries can be pickled.

Photo credit: Andrew Butko [CC BY-SA 3.0]
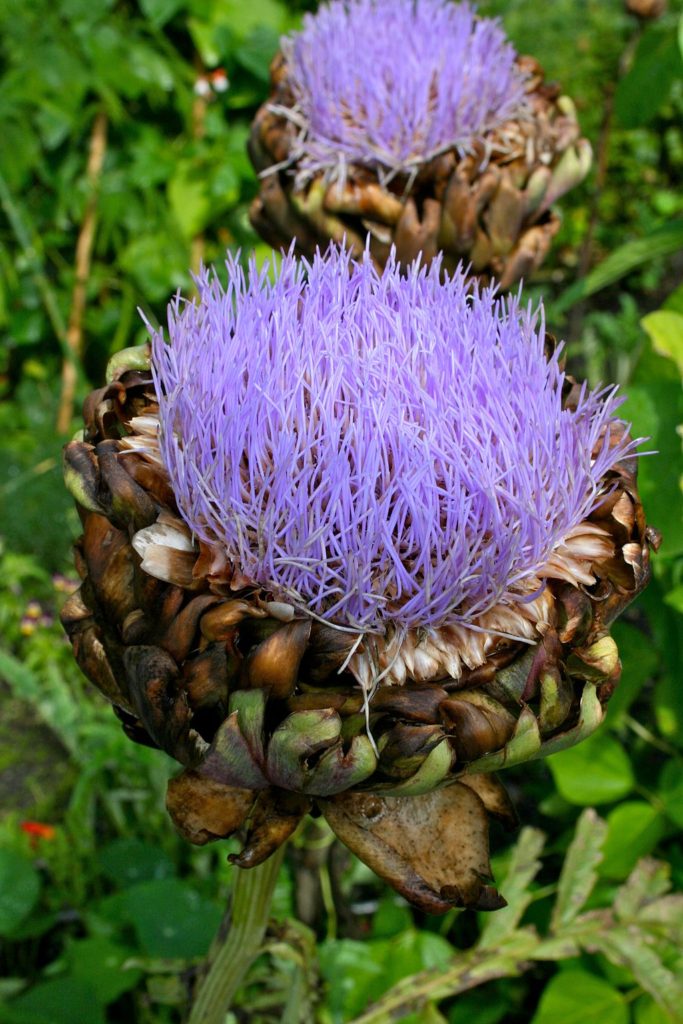
Artichokes

What about considering adding artichokes? They are extremely ornamental looking and add contrasting texture and color to any landscape design. If you allow them to flower the gorgeous purple blooms are a sure showstopper in the garden.

Photo credit: Photograph by Mike Peel [CC BY-SA 4.0]
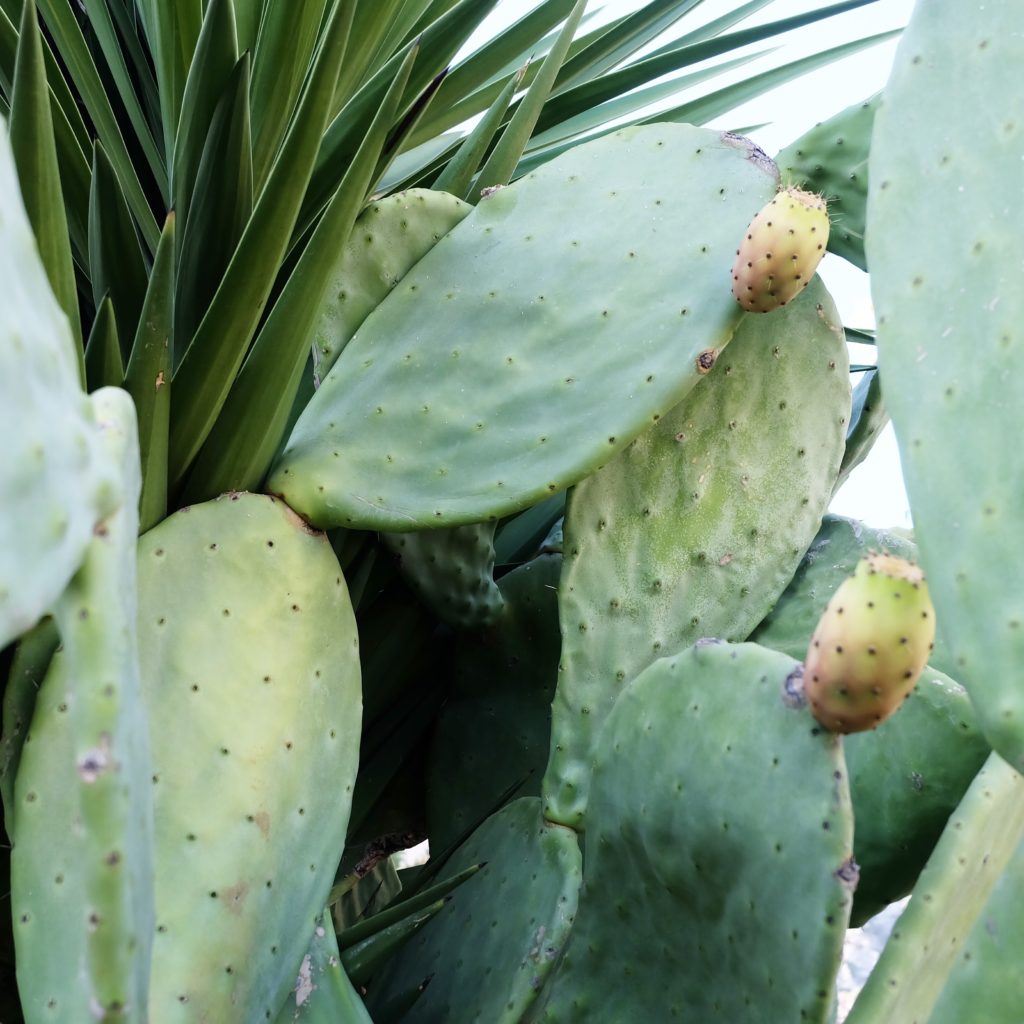
prickly pear

Prickly Pear

Don’t forget the cactus family. Prickly pears are highly nutritious.The paddles(nopales), are popular in South Western cuisine and also used to treat the nastiest of insect bites, stings, and even snake bites.
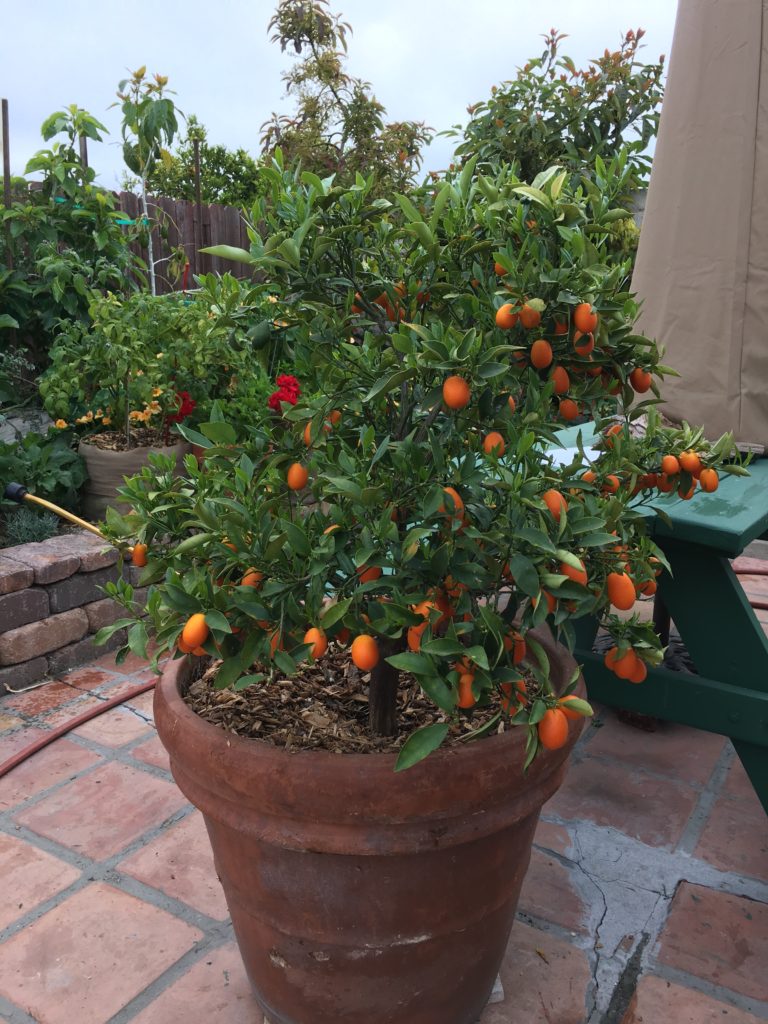
Dwarf Kumquat

A dwarf kumquat is another excellent addition for the front yard. Since they stay small, they won’t stick out and the fruit is ornamental and beautiful.  If you are explicitly allowed to plant citrus in the front, the sky is the limit here in Phoenix.

Bedding Plants
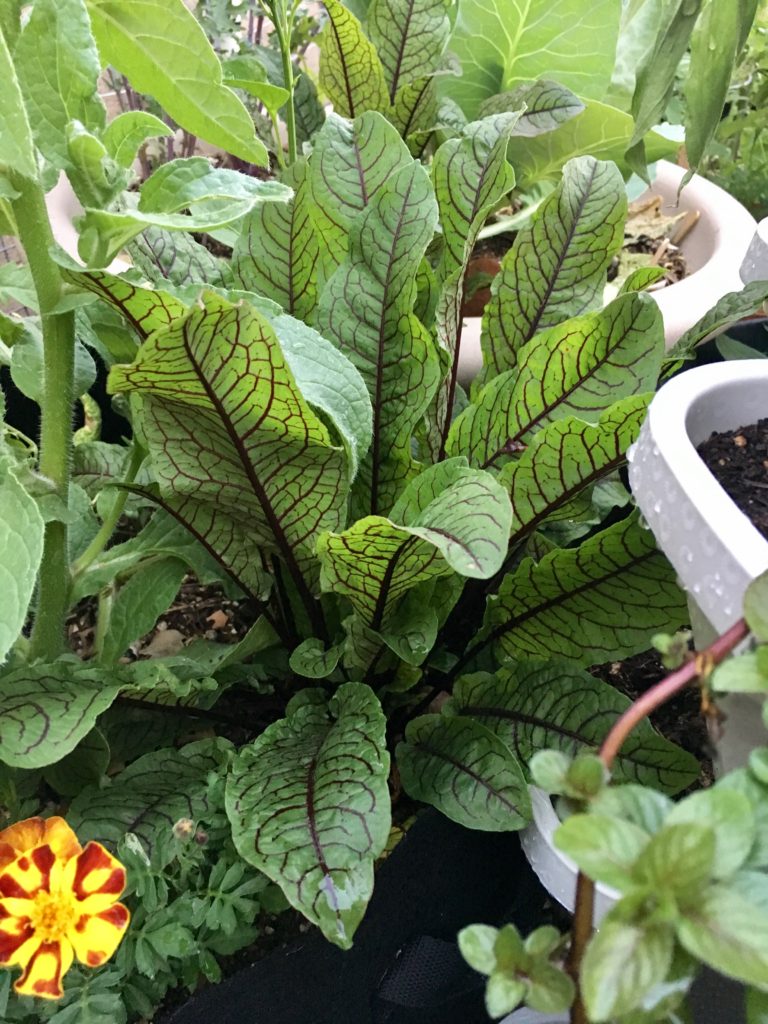
red dock

Red (bloody) Dock

In fall, red dock or bloody dock is a very attractive leafy green that can be used in salads, soups and sautés.
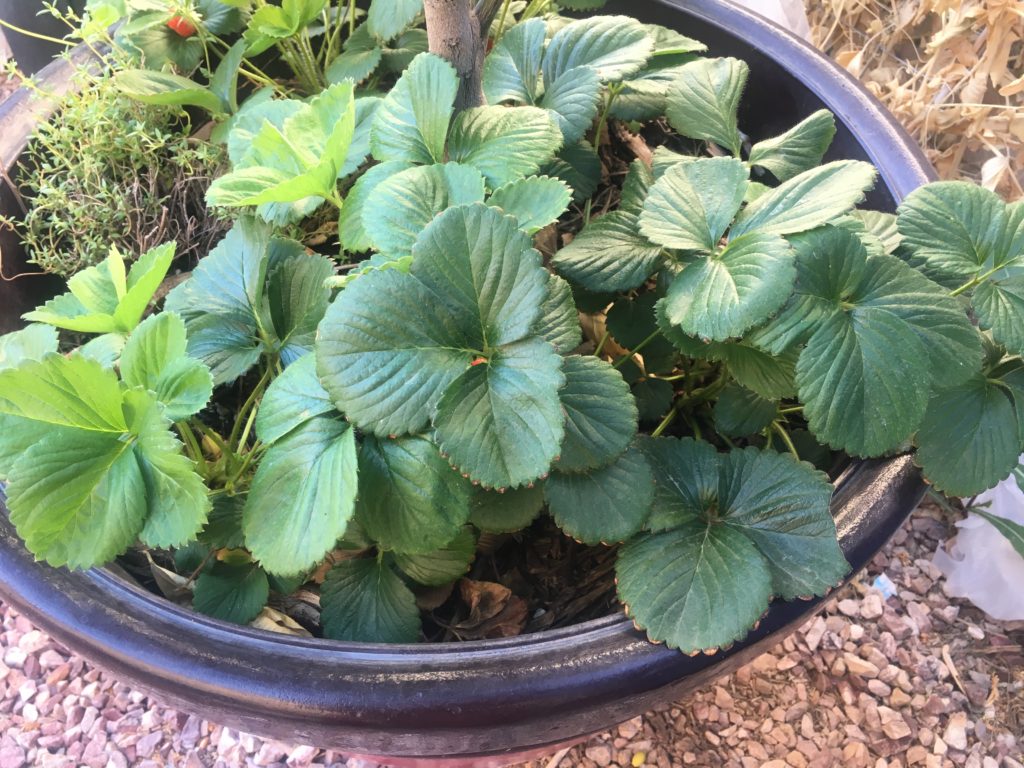
Strawberry

Tuck a few strawberry plants in with your bloody dock and add a few clumps of chives for an attractive display that is completely edible.
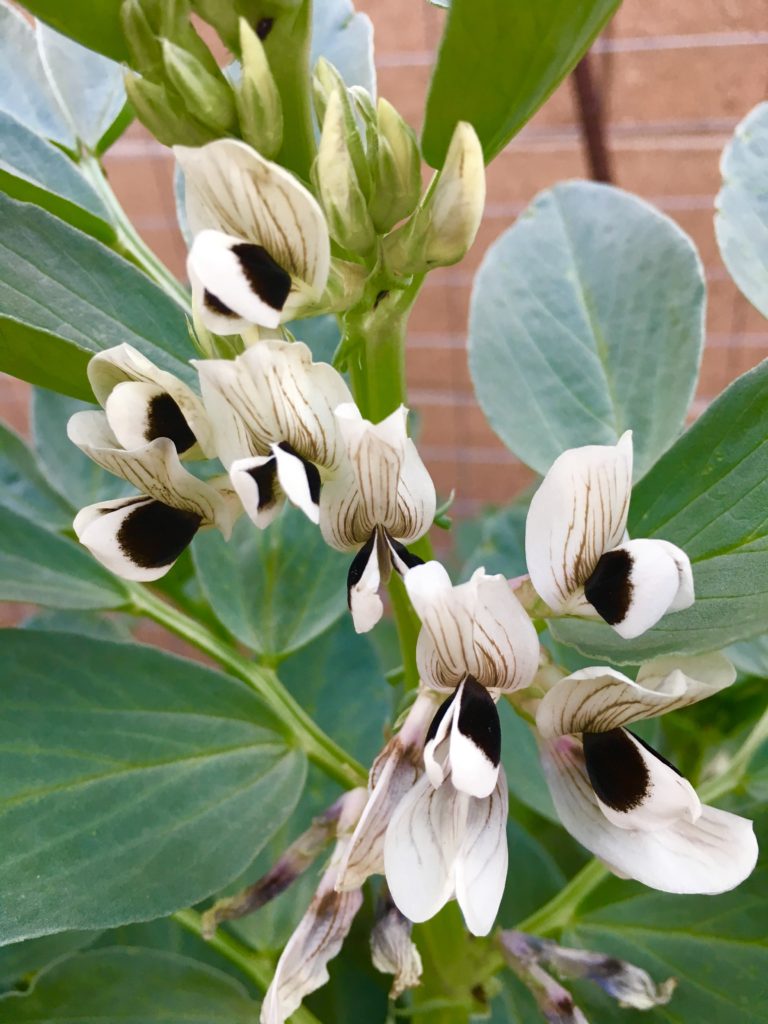
fava bean flowers

Fava beans

I would also consider planting fava beans. They have stunning flowers, which are typically white. However, the crimson variety sends up a gorgeous display of pink to crimson flowers. Fava beans do not grow taller than 4 feet and are very attractive in the fall-winter garden and into early spring. Fava beans may require a border support to keep them neat and tidy and prevent questioning eyes from your HOA.
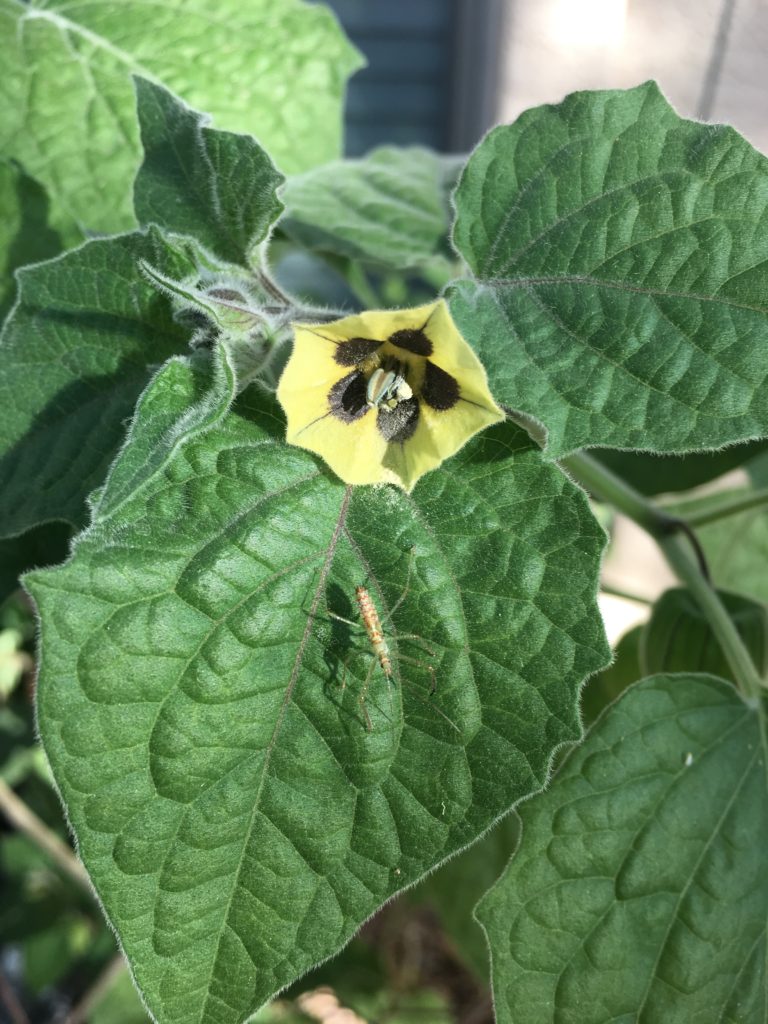
cape gooseberry flower

Cape Gooseberry

The Cape gooseberry would be another addition to tuck in somewhere, The paper covered fruits, look rather novel and would not easily be recognized.
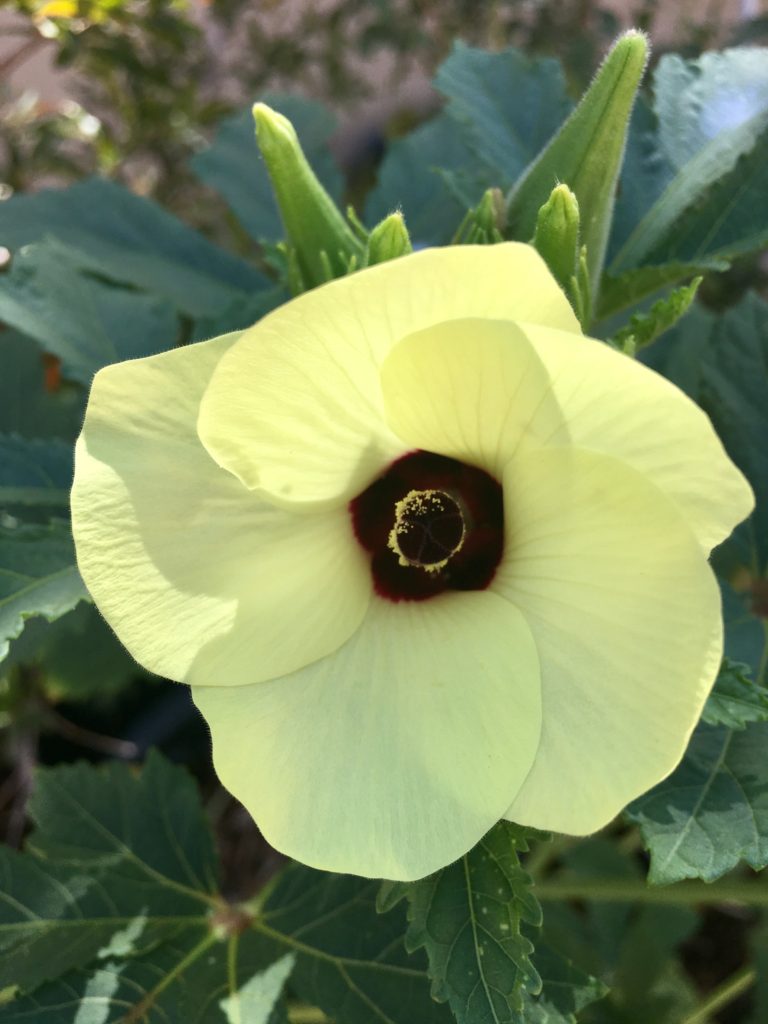
Okra

For the summer garden, try a couple of okra plants in a really showy variety. Okra blossoms are one of the most attractive flowers in the garden. Varieties like burgundy and bowling red okra add some lovely, unexpected color.
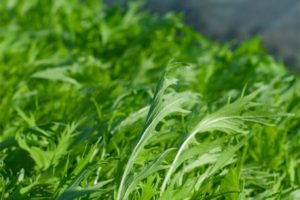
mizuna mustard

Mizuna Mustard

Mizuna Mustard purple and lime streaks are really striking and ornamental looking as well as orach, all of which are nutrient dense additions to your diet and great fall, winter and early spring options.

Photo credit: Flickr user Masahiko Satoh [CC BY 2.0]
Category: News & Stories, Tips and Tricks

Epic Guide: The Right Way to Plant a Fruit Tree in the Desert

June 23, 2019 //  by jessica.m.ricco@gmail.com//  5 Comments

Before planting a tree there are a few considerations to keep in mind. Some fruit trees are easier to grow in the desert than others. Some may need a lot more in terms of microclimate, specific nutrition and soil. Therefore, we have divided trees into 4 levels with level 1 being the easiest to grow in our desert climate.

fig

LEVEL 1

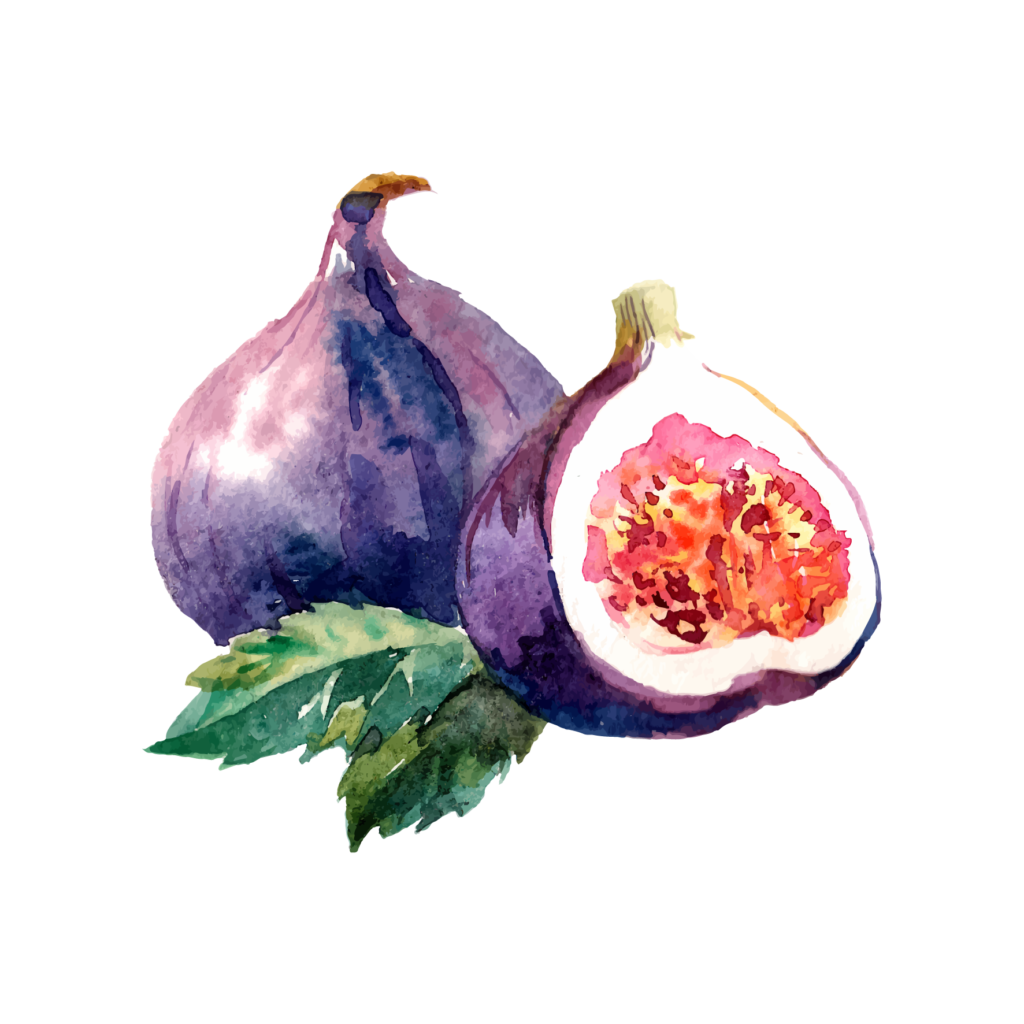
The easiest trees to grow in the desert. These include figs, pomegranates, and mulberries. They can be planted into native clay and do not require any specialized care. (This is NOT to say they do not need a basic level of care, such as regular deep watering, and a proper sized hole.) These are the best trees to start with if you are an absolute beginner gardener.

LEVEL 2

This group requires the grower to pay a little more attention to nutrients and microclimates. Root stock knowledge is also advisable for some groups like apples, citrus and trees in the peach family. This group includes citrus, apples, peaches and guavas.

LEVEL 3

Level 3 trees require more help adapting to our climate. They often need shade when younger and protection during winter. This group includes a large number of tropicals such as bananas, papayas, mangoes, persimmons, and starfruit. They are best for the gardener who has a solid understanding of creating microclimates and has already established microclimates by planting out larger trees, or has built some kind of structure to provide shade and cold protection.

LEVEL 4

This is the extreme tree growing category. These trees will need exceptional care and there is always the risk of losing them. Trees in this group include avocado, lychee, and tamarind. They are almost always tropical trees that are sensitive to extreme temperatures, salt/alkalinity, and dry climates.

UNDERSTANDING
BAREROOT VS. POTTED TREES

At different times of the year, trees are available either as bare roots or potted trees. Bare root trees are typically available at the very beginning of spring when trees are about to come out of dormancy. 

Typically, deciduous trees are sold as bare roots roots at this time of year. Deciduous trees are also available as potted trees later in spring and in the fall. A bareroot tree is a tree that was grown in-ground initially. The commercial grower removes it from of the soil when dormant, and stores it in a cold facility until it is sold as a bare root. This means that bare root trees have lost a large part of their root system. If it was a tree that has a tap root, the tap root won’t regrow, however, new side roots will develop to stabilize the tree. 

Many gardeners struggle with cutting the top of a bare root tree when planting. However, reducing the canopy by at least one third is important to reduce stress. The root system has been reduced and will not be able to support the original canopy. Reducing the size allows the energy to go towards establishing a new stronger root system. In addition, there is a great method for growing smaller fruit trees outlined in the book, Grow a Little Fruit Tree (below). The concept is simple, a smaller tree is easier to maintain, easier to prune, easier to protect, and easier to harvest from. 

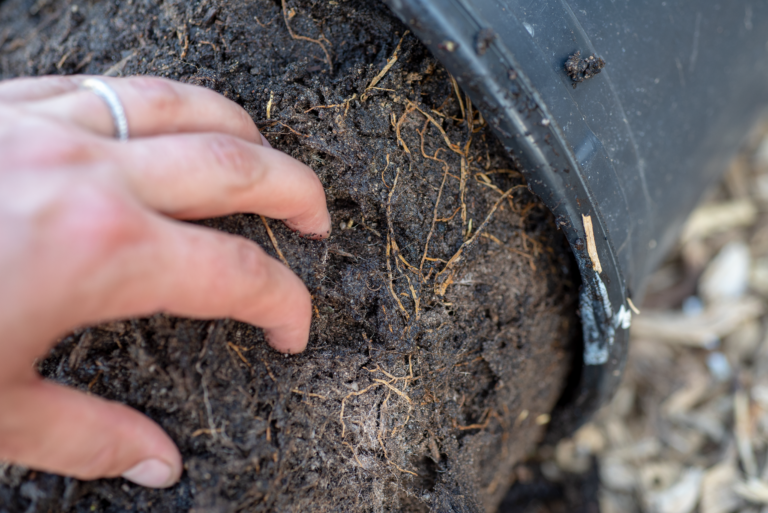
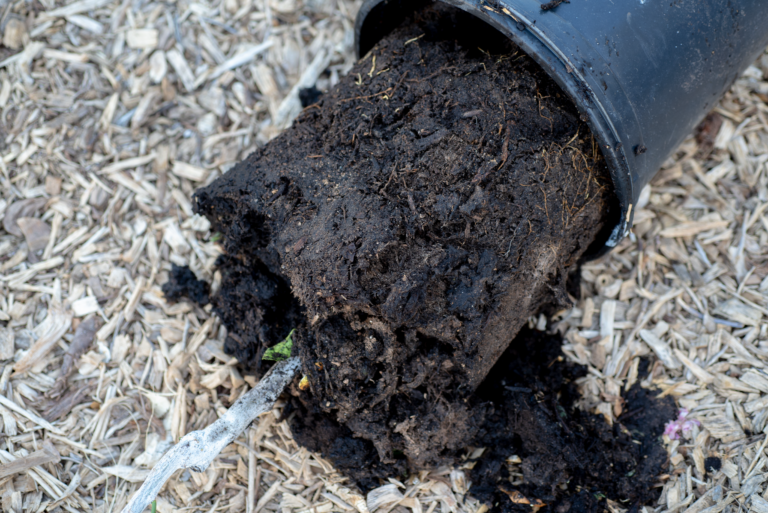
Tropical and sub-tropical trees and citrus, don’t go fully dormant and are therefore always sold as potted trees. As mentioned above, potted trees are available during the fall and spring. While bare roots have a reduced root system, potted trees could have root issues unsuspecting gardeners may be unaware of, such as being pot or root-bound. At the worst, this could mean strangulation of a main root as side roots circle around inside the pot.

How to Plant A Tree In-ground

Step 1: Site Assessment

The first step is to pick out the right spot for your new tree. Take into consideration all the requirements for that tree in relation to soil, watering, and sun requirements. 

If you do not have the correct microclimate, you will want to create that before planting, or consider planting in a different area that is more suitable to the needs of your tree.

Photo Credit Silvia Messmer

Step 2: Checking Drainage

Evaluate soil drainage at least two days before you plant. (TIP: Consider checking drainage and preparing the hole several months in advance. See below for our advice on preparing planting holes.) Start by watering the spot on a slow drip for about an hour. This will help to soften the native dirt and help make digging the hole easier.

Note: If after a few hours, water has not soaked in, consider moving to a new spot. This is an indication that this particular spot is not a well draining location

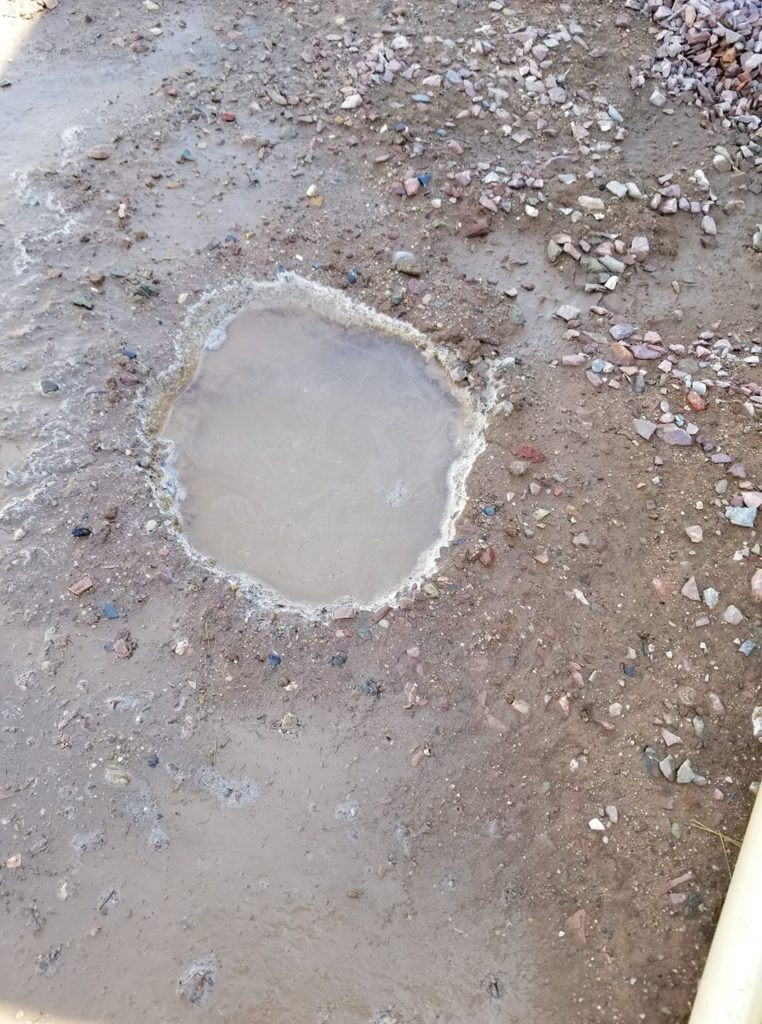
If the water has soaked in, the ground should be easy enough to dig a planting hole (and further assess any drainage issues.) Dig a 1’ x 1’ hole and fill it with water and let it drain completely at least twice. Wait twenty-four hours, then check to see if the hole has standing water. If it does, this is not a well draining spot. Water should drain at least two inches per hour. Poor drainage could be due to caliche, compaction, or heavy clay.

Solutions for Drainage issues

Break through caliche. Caliche shows up as light/white-cream layers in the soil. It can be a thin layer to several feet deep.  A thin layer of caliche can be punched through with an auger to improve drainage. You can rent a 1-man, gas-powered auger from Home Depot, if needed. Read our article on Soil for more information about caliche.

Use a mix of calcium and sulphur. Soil sulphur and calcium work together to flush salts and improve overall soil health and drainage. Soil sulphur breaks down to sulphuric acid, which bonds with calcium to form gypsum and flush salts. It also lowers pH of the soil. There is also a product called Alka-Liche, which contains actual sulphuric acid and therefore works more quickly. We have not personally used this product by have heard about successes from other desert gardeners. 

Plant deep-rooted companions. Consider planting deep-rooted companion plants such as vetiver, daikon radish, dandelion, borage, in the immediate area or even in the same hole if it is wide enough.

Yucca extract. Yucca is a native desert plant that has adapted to the native desert climate and soil (high salt, low water, poor drainage) and has developed methods of thriving. Using yucca extract helps non-native plants utilize some of these advantages by reducing/washing away salt build up in the soil and allowing water to seep into the soil more evenly (it is commonly used as a wetting agent). It also feeds the soil microbiology.

Worms. Worms will move through soils taking organic matter deeper into the earth. This adds aeration and fertility and also improves soil structure.

Organic matter. Consider composting directly in the hole in advance (see below).

Lava rock. Lava rock improves drainage by holding onto moisture and releasing it slowly.

Step 3: Digging the Planting Hole

Start by digging a hole 2-3 times as wide and twice as deep as the size tree (container) you plan to purchase. 

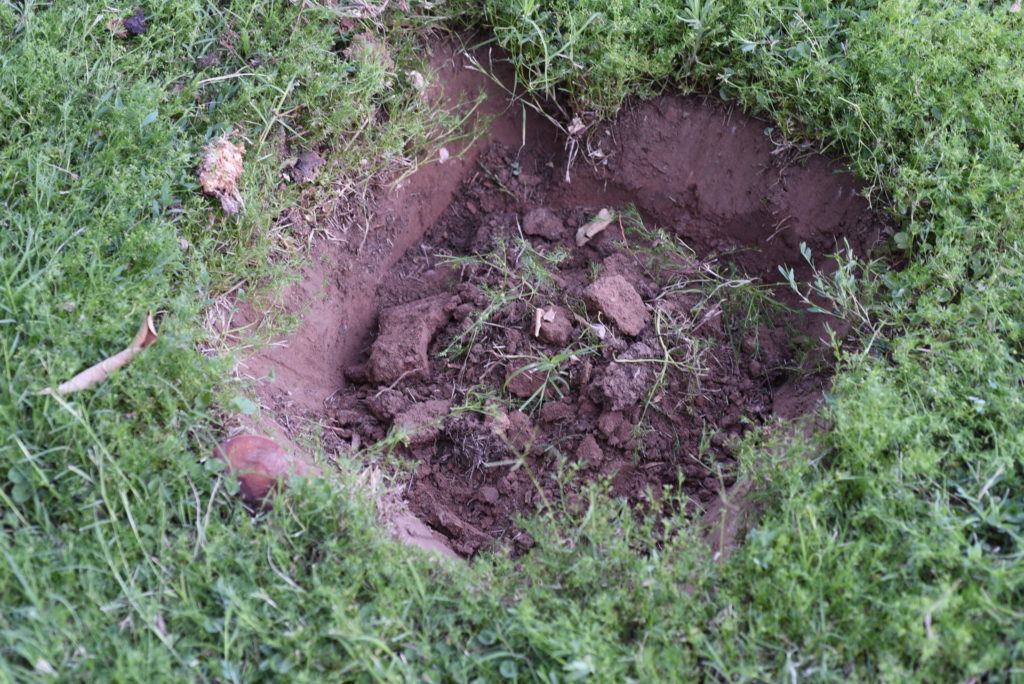
We advocate for planting in square holes! In a round hole, plants are basically in a large clay pot in our native soil. The roots will grow in the direction of the hole, basically round. A square hole though, has sharp sides and corners. Roots will naturally grow out towards the corners, that are easier to break through and spread out.

In addition to digging a square hole, be sure the sides of the hole are roughed up and not smooth. Use a sharp trowel or small rake to scratch the sides of the hole. This enables roots to more easily break out of the hole into surrounding soil. 

Preparing Tree Holes in Advance

For level 3 and level 4 trees, you may want to consider digging and preparing the hole 3-6 months prior to actually planting the tree. Most of the trees in these categories are tropicals that require more organic matter and better draining soil than what naturally occurs in most areas here in the desert. 

Additionally, high alkaline soils are also not conducive to growing these trees. Fill in this hole with compost, worm castings, and any organic matter you have on hand (wood chips, produce scraps), which are naturally a more neutral pH. Add worms to the hole. The worms will not only loosen the soil as they move, but will help break down any food scraps and distribute good bacteria and worm castings throughout the area. This will begin establishing the soil life and loosening the earth in preparation for your tree. 

You can also consider planting some deep-rooted plants around the hole to further break up the soil – these can be temporary or stay as companions to the tree. Vetiver grass has roots that can reach well over 5 feet deep when mature.  Plants like borage and dandelion can be cut down at the end of the season and the roots can be left in place to decompose, further increasing the soil quality.

A Few Words on Hole Size

There is a lot of debate about exactly how deep and wide to dig a hole to give a tree the best start possible, and also not spend days digging (especially in dense clay). Regardless of the exact size of hole you are able to dig, consider the future root growth and health of the tree. Roots should be able to stretch outwards when you place the tree in the hole and not circle around the hole (essentially mimicking being root/pot bound). There should also be sufficient drainage away from the root ball, especially for trees in level 3 and 4 as they are very sensitive to poor drainage.

Step 4: Preparing the Tree

How to Prepare a BareRoot Tree For Planting

If you are purchasing bare root trees in a store (versus ordering online/through the mail) examine the roots carefully to ensure they are in good condition and are not rotting. Also look for wrapped or crossing roots around the flare. Consider the branch structure, looking for trees with evenly spaced branches that form an open goblet shape. A scratch test of the trunk for green cambium is also beneficial. If the tree is not green when you scratch it, it is not alive. If you have ordered online, you should still examine trees using these methods and contact the seller immediately if there are any issues. We trust Peaceful Valley Farms for bareroot trees.

Soak your bare root trees immediately upon arrival, preferably overnight. However, they should not be soaked longer to prevent the roots from rotting. We suggest soaking in a solution of water with some added mycorrhiza and liquid seaweed. 

It is best to make sure you dig your planting holes ahead of time so you can plant the tree as soon as it arrives. If you cannot plant trees within 24-hours of receiving them, keep them in a cool place (like the garage) and keep their roots moist. We’ve had success covering roots in moist sand or wood shavings (misting them everyday) until planting. 

How to Prepare a Potted Tree For Planting

If you are planting a potted tree, soak the pot well before carefully removing the tree. Examine the roots to make sure the tree is not root bound or diseased. If it is a young tree with no signs of root strangulation, girdling, or excessive crossing, then gently loosen the soil and stretch out some of the outer roots so that they can point outward and downward in your hole. 

For larger trees (15-gallon nursery pots and above), soak the tree for a couple of hours to loosen the soil around the roots. This allows for better examination of root health. 

Crossing roots or girdling roots can choke the tree and should be untangled or, if very severe, cut off to avoid issues later. 

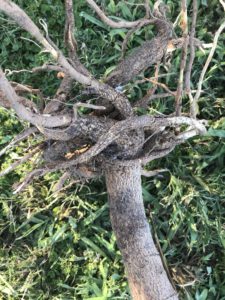
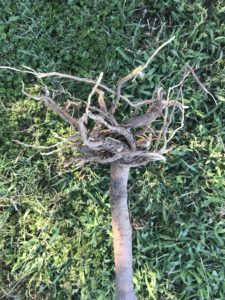
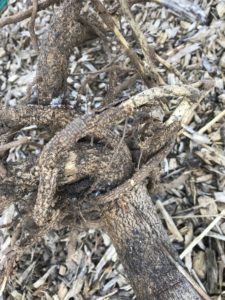
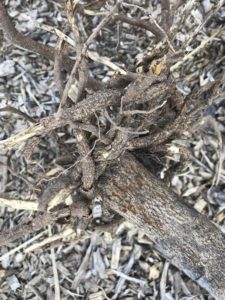
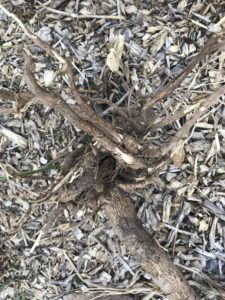
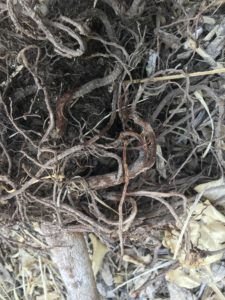
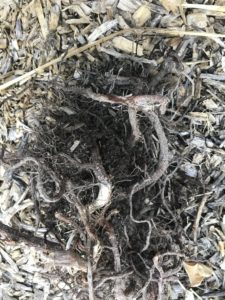
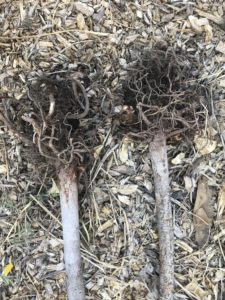
The photos below show examples of three trees with crossed and circling roots. Two of these trees were Ficus Nitida from Lowes. They were excessively rootbound and the roots were not properly trimmed (we live and learn) prior to planting. Both of these trees struggled and ended up dying over the winter despite extra care. The third tree was a neem tree purchased from a local tropical tree nursery. The cold definitely contributed to its demise, but the twisted roots also reveal an additional culprit! 

rootbound-tree-9
rootbound-tree-8
rootbound-tree-7
rootbound-tree-6
rootbound-tree-5
rootbound-tree-4
rootbound-tree-2
rootbound-tree-1

Note: The steps for preparing a potted tree are the same for in-ground and container planting. Be sure your hole is prepared or your potting materials are accessible and ready prior to removing the tree from the pot. Extended exposure to air and sunlight is damaging to roots.

Step 5: Planting

To plant, loosen roots and fan them out. All roots should point outward, which may mean you need to dig your hole wider or trim some roots depending on the exact shape of the roots. Note: Do not trim roots excessively as they will not be able to sustain the tree.

Position the root ball on a mound of lightly compressed backfill. For level 3 and 4 trees, the addition of lava rock is advised for this mounded backfill, to further help with drainage. The tree should be planted so that the root ball is higher than the ground. The reason being that the tree will settle over time and it should not sink so that it is sitting lower than the ground level. This use of gravity (planting on a mound) benefits the roots in two ways. a) they are encouraged to grow downwards and deeper. b) Water will also soak in deeper, preventing the roots from sitting in soggy soils.

If using granular mycorrhiza, add now, making sure the granules make good contact with the roots.

Backfill the hole using a mix of compost, earthworm castings and native soil. Level 1 and 2 trees can be backfilled with native soil only.

Step 6: Double Ring Tree Well

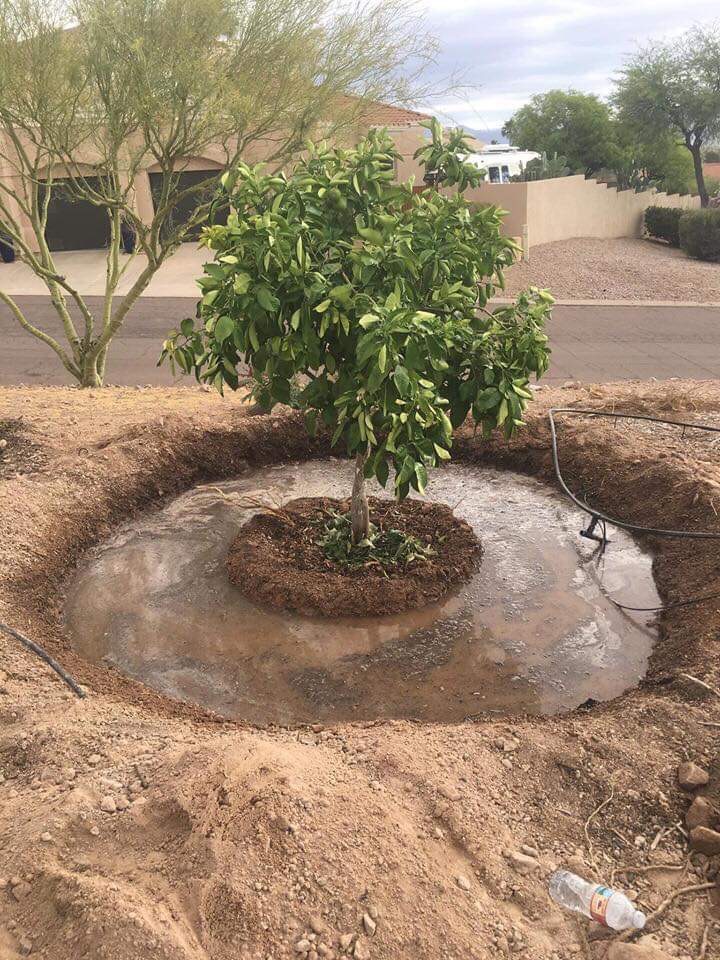
Use the double ring method to create a well and berm around the tree. If planted correctly, the root ball should be slightly elevated. Make a 12-inch wide mound around it. 

Essentially, this is so that moisture drains away for the trunk. The mound can made with compost. 

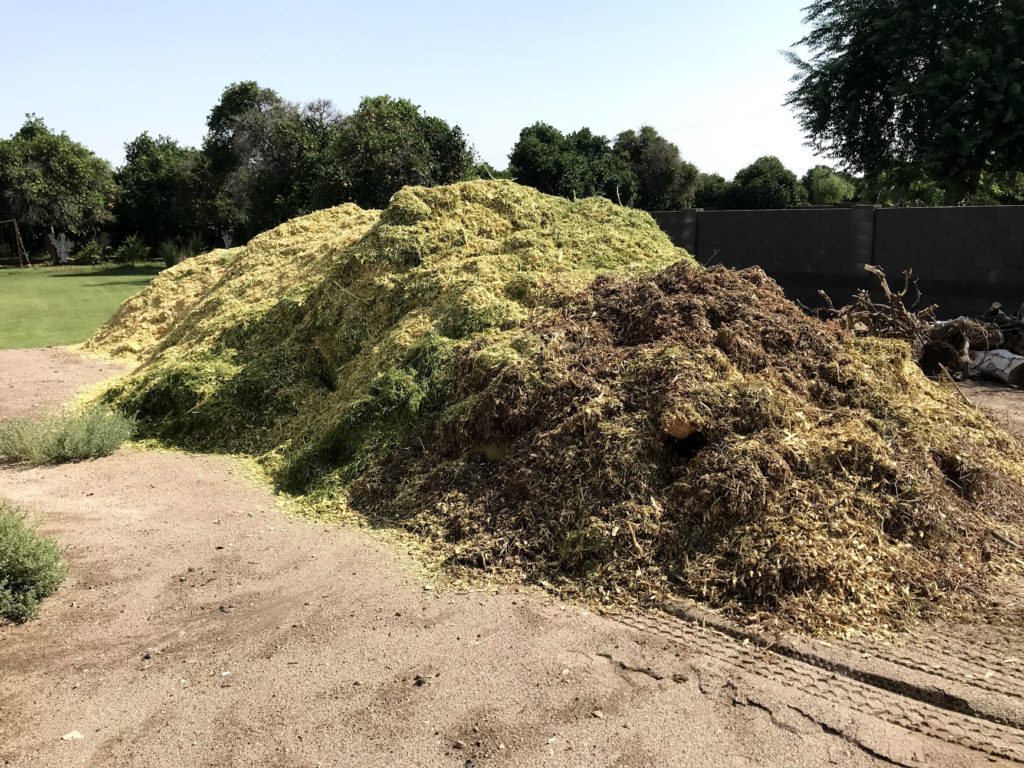
Then make a trench around the mound, this is going to hold the water. This is where to water as it will encourage the roots to grow out. Pile mulch on the mound, but keep it away from the root ball and trunk. 

Photo Credit Rose Anouti

Note: With a newly planted tree, you will need to water in the mound area as roots have not yet expanded to the outer area.

Step 7: Staking

The correct way to stake a tree is using a double stake method. This supports the young tree without impeding growth or preventing movement and sway. The ability for a tree to be able to move and sway in the wind strengthens the trunk of the tree, rather than weakening it. 

Wooden stakes work well. Choose ones that are at least 2 inches thick and five feet tall.  They should be inserted about two to three feet away from the newly planted tree depending on whether it is a smaller or larger tree. The stakes need to be driven into the ground at least eighteen inches deep to ensure they are secure. 

Polyethylene strips or 3-inch webbing can be loosely draped around the trees’ trunk and then secured to the stakes. 

You should also not put a post right up against the trunk of the tree – a helpful reminder from our friends in the Organic Desert Master Gardeners Facebook group.

This self locking kit is also very useful (see below).

Step 8: Adding Mulch and Amendments

Add amendments in the tree well (not right up against the trunk) once the tree has been planted. Earthworm castings and compost are the best amendments to use. Slow release nitrogen and acidifying amendments are also good. We recommend Cottonseed Meal and Neem seed Meal. Young fruit trees will not need phosphorus in the first year as it is best to not let them fruit yet, which forces energy into growing roots.

Cover the entire area with at least 4 inches of mulch.

Take care not to bury the root ball too deeply. It may be a good idea to use a trunk protector to prevent organic matter building up against the trunk. 

Water the mound and fill the surrounding well and use a liquid mycorrhiza if you did not use a granular one.

For continued watering care

See our in-depth article on watering. 

How to Plant A Tree IN A CONTAINER

Both bare rooted trees and potted trees can be planted into containers. Preparation is the same as for planting in-ground (details above). The key is to inspect roots and untangle any that cross or trim any damaged or permanently intertwined roots. 

Wherever possible, select trees on dwarf root stock or trees that do not grow very large.

Step 1: Preparation

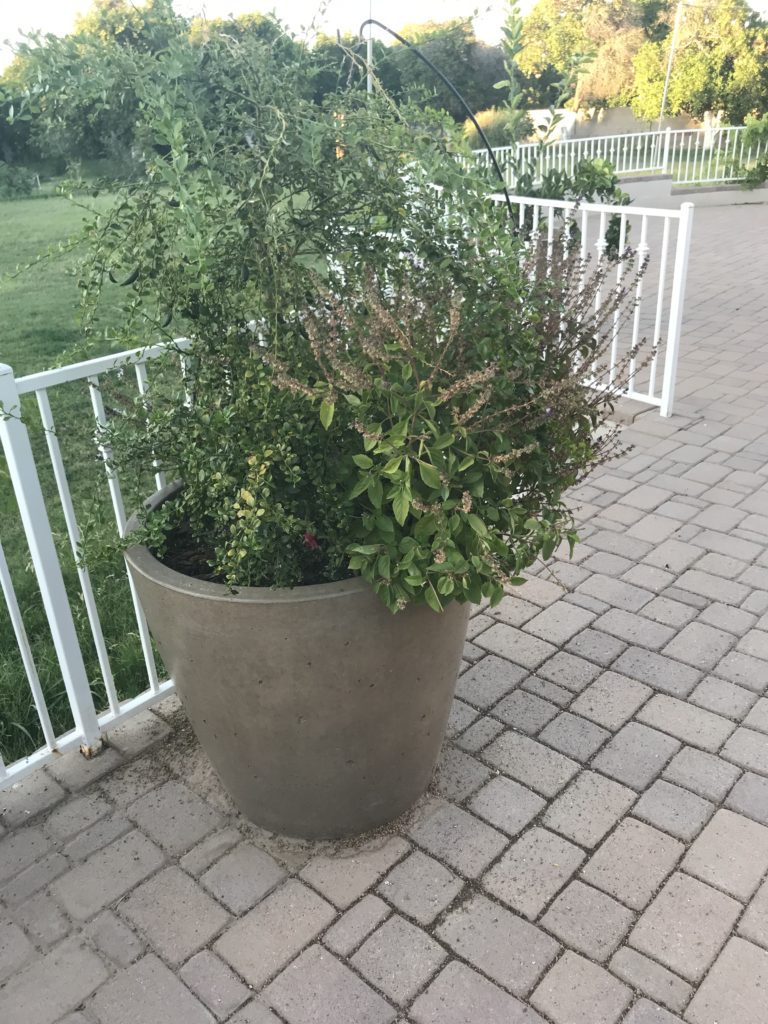
Always use the largest, widest pot you can when planting trees in containers. A 15-gallon nursery pot is the very smallest you should use. 

Prepare a mix of 1/3 each compost, potting soil, and native clay. Clay is important for its ability to hold moisture. Our native clay is also very high in trace minerals.

Also add in 1/4 inch horticultural lava rock for drainage, equal to half the amount of compost used.

Because potted tree roots are in a confined space and will not have a regular change in growing medium, it is ok to mix amendments in with the soil. We recommend worm castings, cottonseed meal and neem meal. A soil acidifying amendment also works well.

Step 2: Planting (and Possible Staking)

Care should be taken not to plant the tree too deep, the root ball should sit slightly higher than the rest of the growing medium.  A tree guard can be used to protect the tree from getting mulch against the trunk. 

Depending on the growth pattern and height of the tree, it may require staking. For example, a low growing bonanza peach that is about 4 feet tall will not need to be staked, but an apple tree with leaner limbs and taller growth pattern will need to be.

See the staking tips in STEP 7 of planting in-ground.

Step 3: Mulching

Container grown trees absolutely require mulching.

Ensure that there is at least a three inch mulch layer on top to protect soils, keep moisture in and soils cooler.

The area around a tree can also be planted out with companions. Herbs, small flowers, strawberries, garlic and even bunching onions can be used.

Step 4: Re-Potting

Potted trees are have a confined area for root growth and also a limited amount of soil. Over time the soil in the pot will be used up. They should be repotted every two to three years for continued access to living soil and for overall health.

WATERING AND WATER METERS

A vital tool to have on hand for container growers is a moisture meter. We have more watering tips for continued tree care under Watering. Also, see our in-depth article on watering. 

Category: News & Stories, Tips and Tricks

Garden of the Month: June

June 16, 2019 //  by jessica.m.ricco@gmail.com//  Leave a Comment

Yerba Mansa
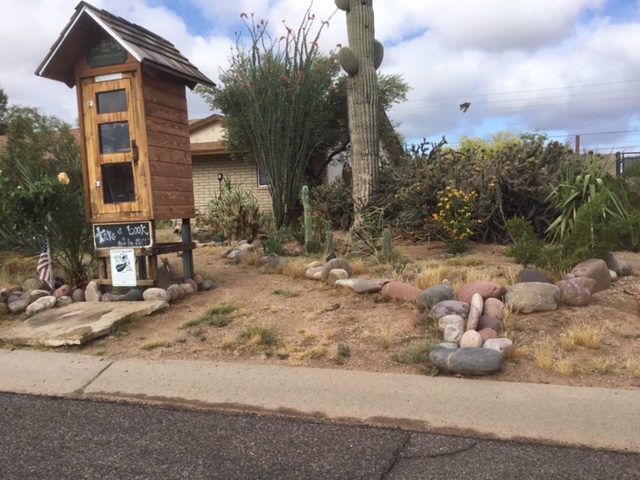
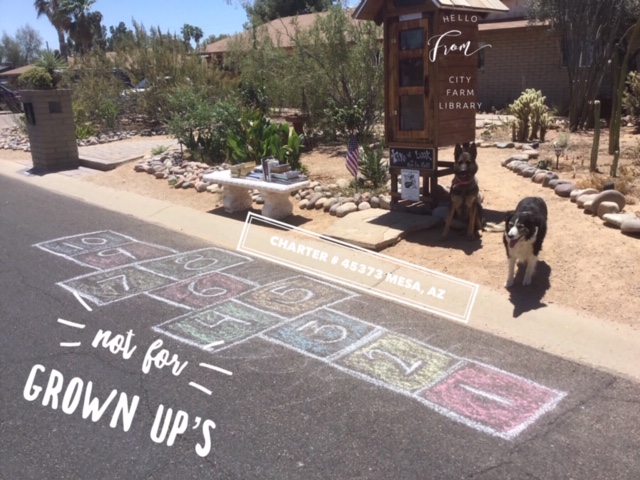
The Little Free Library
Tea in the garden
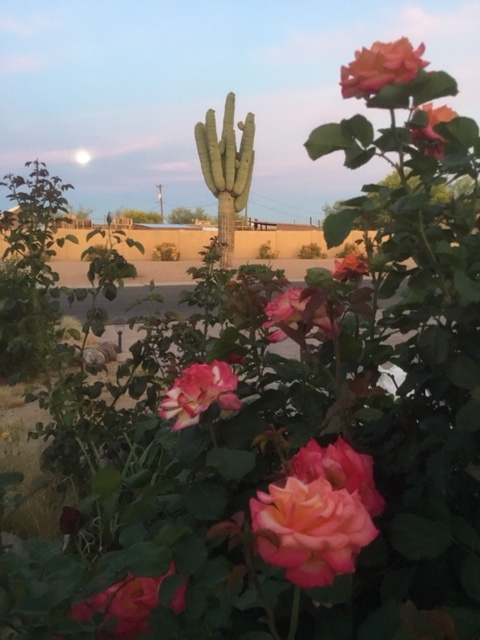
Roses at Dusk
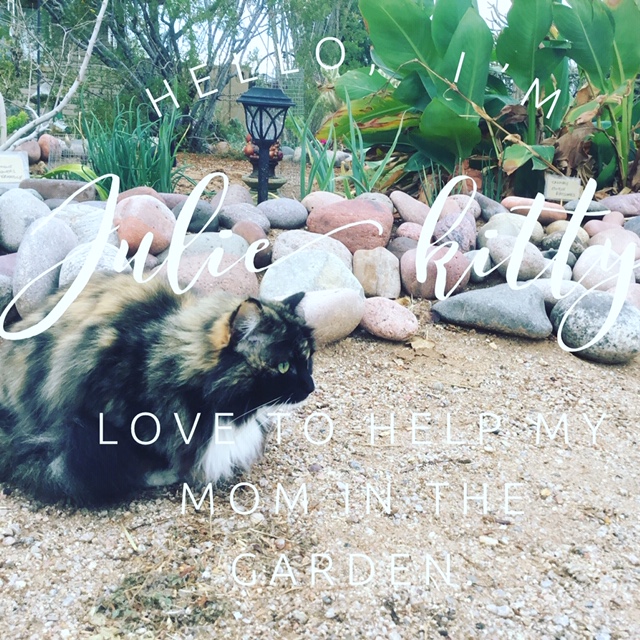
Resident rescue kitty
Muscovy ducks
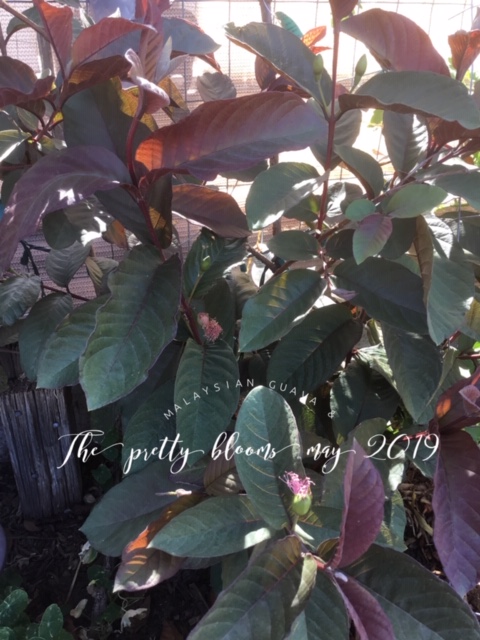
Malaysian Red Guava
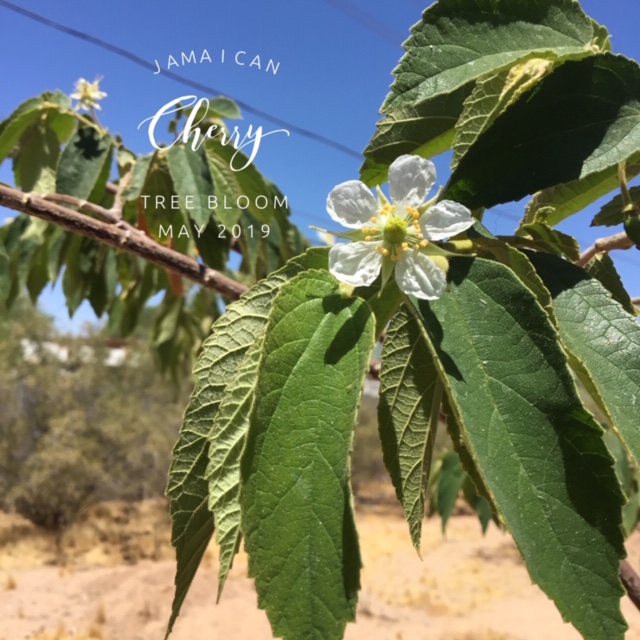
Jamaican Cnerry
Fun Play in front of the little library
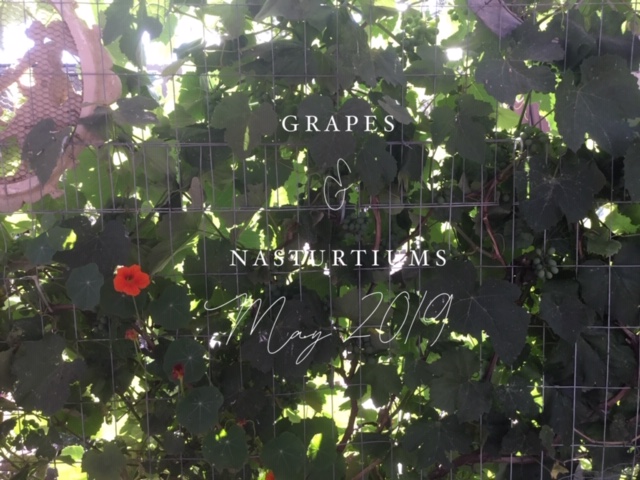
Grapes and nasturtium
Front Yard
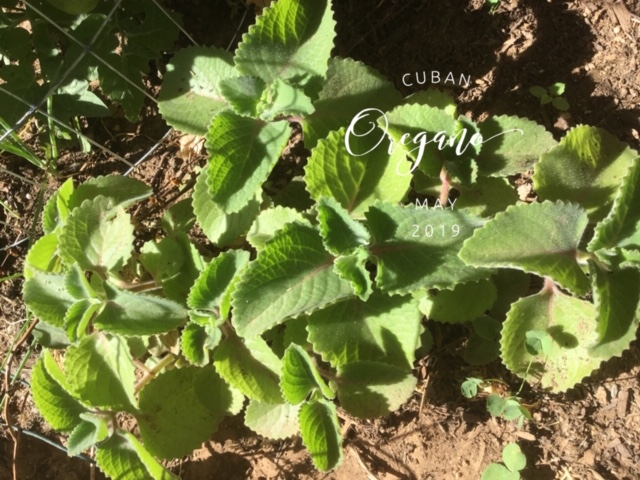
Cuban Oregano
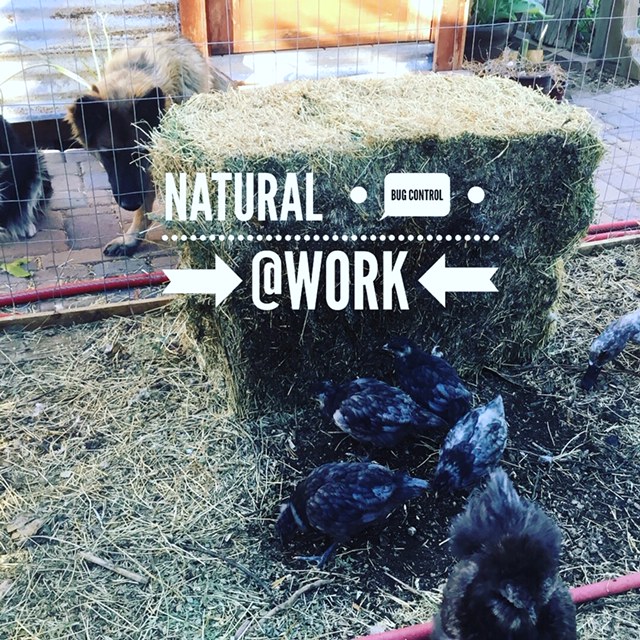
Chickens are natural pest control_
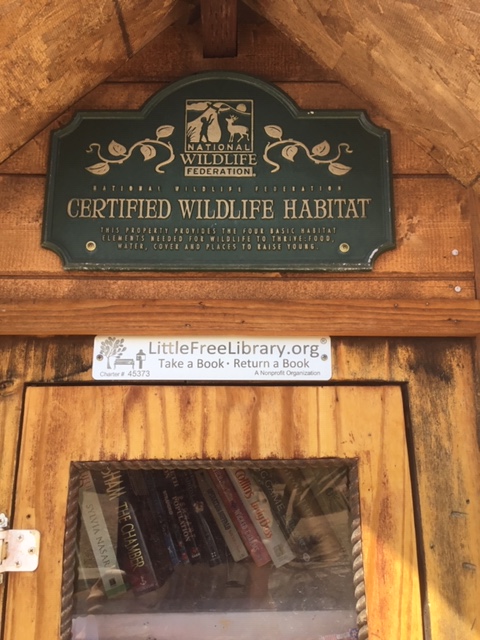
Certified Wildlife Habitat plaque
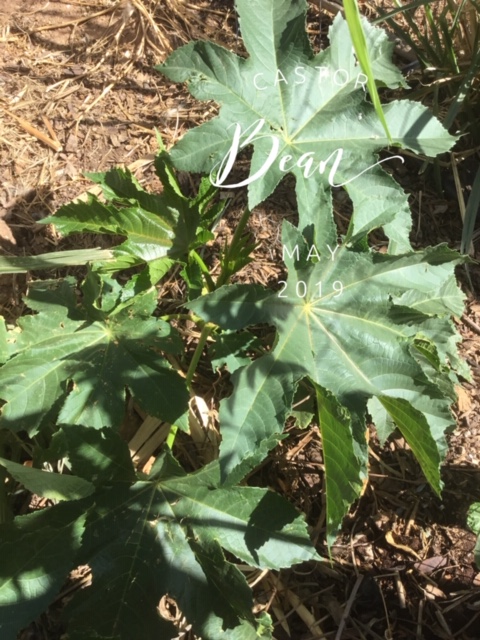
Castor Bean Seedling
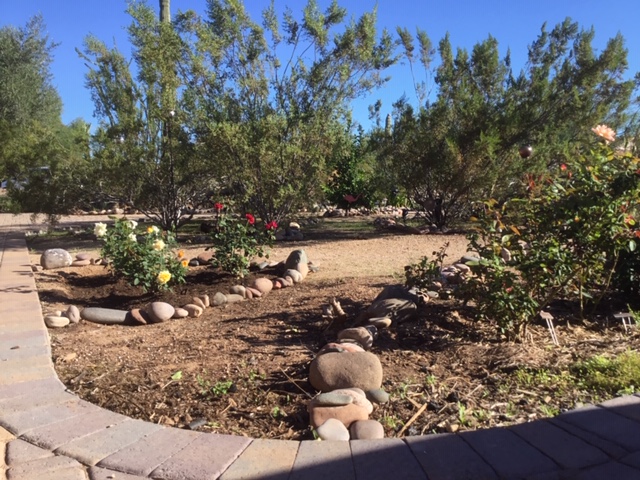
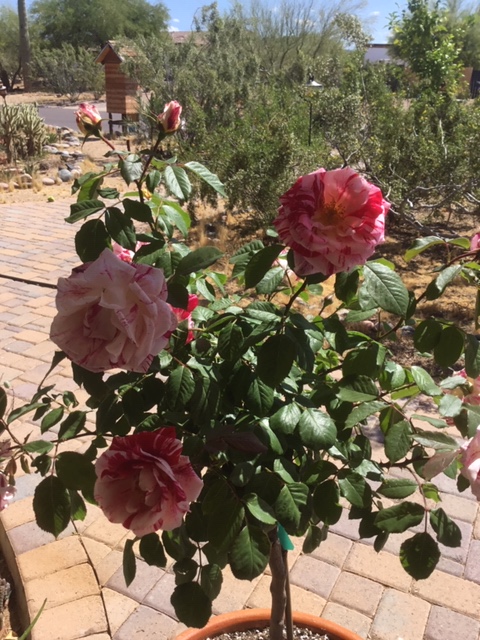
Beautiful Roses
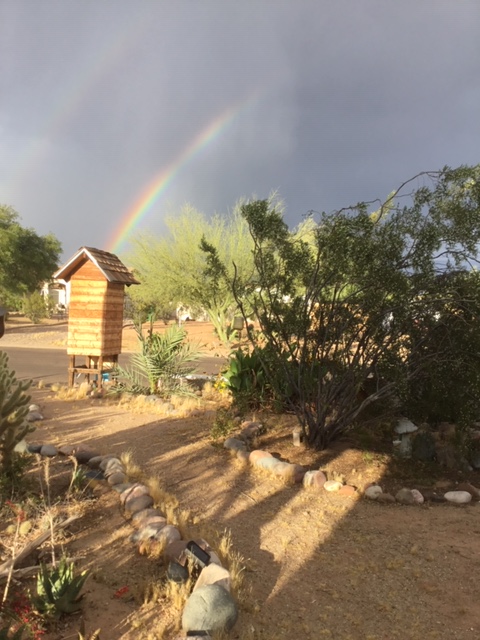
Beautiful rainbow_

As I drive up to City Farm, a small family of quail scutter across the street from this wildlife sanctuary. It’s 9am and already 90 degrees (F), yet the garden has this cooling and slowing down atmosphere to it. I appreciate the lovely perfume of the creosote bushes as I walk up to the door, checking out what’s growing on the way.

City Farm belongs to Dephane and her family. This garden is a true wildlife refuge, having received two plaques, one from the National Wildlife Federation and the other for providing safe Monarch butterfly habitat.

Dephane is wonderfully warm and welcoming, and all her surroundings reflect that. As she takes me for a tour through her garden, I notice all the lovely spots designed for relaxing, entertaining, and enjoying the outdoors. Sofa beds are tucked away in shady corners, lovely chairs, a table for tea, and candle holders that are definitely well used are strategically placed throughout. Gentle gurgles of water fade in and out as we walk around. There are seven watering stations throughout the garden, as well as 3 very busy bird feeding stations.

This garden is home to several Muscovy ducks, a few chickens and a precious rooster named Peaches.  An array of herbs, several tomatoes plants, and younger cuttings and seedlings are grown on a shady patio. There are several figs trees, mulberries, and many bananas plants throughout the back and front gardens. Native passion fruit, honeysuckle, and other vining plants clamber up trellises. A huge grapevine shades the chicken coop. In the front yard, native desert plants share space with more fruit trees and some impressive rose bushes. Drought tolerant flowers and several sunflowers add even more color and food for pollinators.

City Farm also has a Little Free Library on the property where neighbors or any interested readers can pick up a book or drop some off. During cooler months, the library is not only stocked with books, but also seeds and plant cuttings. While sharing a delicious tea Dephane brewed, I got to find out more about this lovely garden.

What is gardening to you?

It means growing my own food. It is being out in nature. It is the joy of planting one tiny seed and knowing it can grow into something wonderful.

How did your garden adventure begin?

When I was growing up both my parents gardened. Later when I was raising my kids it was fun to garden with them, to pull up radishes from the garden for example. I do garden more now since they are grown.

What changes have you made that have been really impactful?

Designing our garden so that we can use it to teach about wildlife. We hold several classes on how to provide habitats for Monarch butterflies, teaching people how to grow food, even how to have a garden to support wildlife.

What do you enjoy growing?

Fruit trees. I think they are easier than vegetables and they do not die at the end of the season. I cannot wait for all my bananas to be producing.

What do you want other gardeners to know about your garden?

I love to share.  I love to spend time in my garden. I like having friends over for tea in the garden.

What are your biggest gardening challenges?

Bugs. Hungry bugs and critters eating stuff.Sometimes, the dogs.

What are your biggest successes?

The sharing I can do. There is sharing with the little library, a seed library as well. There’s progressive dinners in the neighborhood, where we do a different course at a different home and we can share and learn and teach others how to garden.

Any tips to share with others?

The importance of composting and using waste materials for good. We use the cleanings from the chicken coop in compost. There are also composting worms. We add kombucha and all the kitchen food scraps to the compost. Also, we use leaf debris to build soil. The water from the duck pool is used to water the bananas.

Follow Dephane:

@Dephane_Marcelle_CityFarm
City Farm on Facebook

Category: Garden of the Month

Planting a Three Sisters Garden in Phoenix

June 13, 2019 //  by jessica.m.ricco@gmail.com//  Leave a Comment

The Native Americans tell a story about companions.

As corn grew tall, he watched over the land. Corn felt sad sometimes and did not understand why. One evening corn saw two butterflies fluttering about together. Corn understood for the first time that his sadness came from loneliness and needing companionship.

Bean, hearing his cry, came to offer companionship. Corn said it would not work, because bean liked to wander on the ground, while corn liked to stand tall in one place, his leaves blocking the sun from others below.

Bean was determined though and planted herself next to corn, wrapping her tendrils and vines around corn’s stalks as though leaning on corn. As she wrapped around corn providing support, the two grew tall together.

Adapted from Herbmentor, an article by Sarah Haas

A three sisters garden is adaptable – it can work in the ground, a raised bed or even containers with some creativity. While short varieties of corn have many advantages here in the desert, a taller variety is typically used if you are planting in ground in a traditionally-styled three sisters garden. Both tall or short corn varieties can be used and paired with bean varieties that suit whichever corn height is chosen. We recommend using native varieties, which are better adapted to our higher temperatures, especially in the monsoon garden. Shorter corn varieties use less water and most typically mature sooner than the taller varieties.

Corn is best planted in blocks in a home garden instead of rows, which allows for better pollination. Plant beans shortly after the corn starts to grow, when stalks are about 4 inches tall. They will use the corn as a trellis but also act as an anchor to prevent the corn from falling over in strong winds. Use pole or lima beans, not bush beans when planting tall corn varieties.

Squash is planted to keep the soil cool and prevent the germination of weed seeds. Plant the squash a week after the beans have emerged. Both summer and winter squash types can be planted. Additionally, melons or watermelons could also take the place of the third sister.

The three sisters are often planted on hills in other parts of the country. To conserve water and also capture as much water as possible, depressions or Waffle Gardens are a better idea in our desert. The clay actually works as an advantage to create the berms. Compost should be mixed into the depressed areas to add in organic matter, improve texture and start the microbial life.

Fill a waffle garden with the three sisters and also consider Monsoon Garden plants we suggest in our Monsoon Garden article.

If you prefer to use a shorter variety of corn, plant with cowpeas and melons or even zucchini rather than a huge vining squash. For container planting, work with the largest containers possible. A Big Bag Bed is a great option to plant out a short corn variety with a melon and a few cowpeas. Alternatively, 15-gallon nursery pots can be used to plant three corn each. Do at least six corn plants for decent pollination. A squash or melon seed can be added to the pot and beans can be grown separately next to the corn.

Help with Pollination

However and wherever you plant your three sisters, the corn will need some additional help with pollination.

This is because corn is pollinated by the wind and the backyard grower does not grow as much as a commercial corn farmer to ensure there is enough pollen in the air.

A little shake of each stalk once they have come into pollen every morning and every evening will help ensure full ears.

There are different types of corn that serve different functions in culinary uses:

Sweetcorn

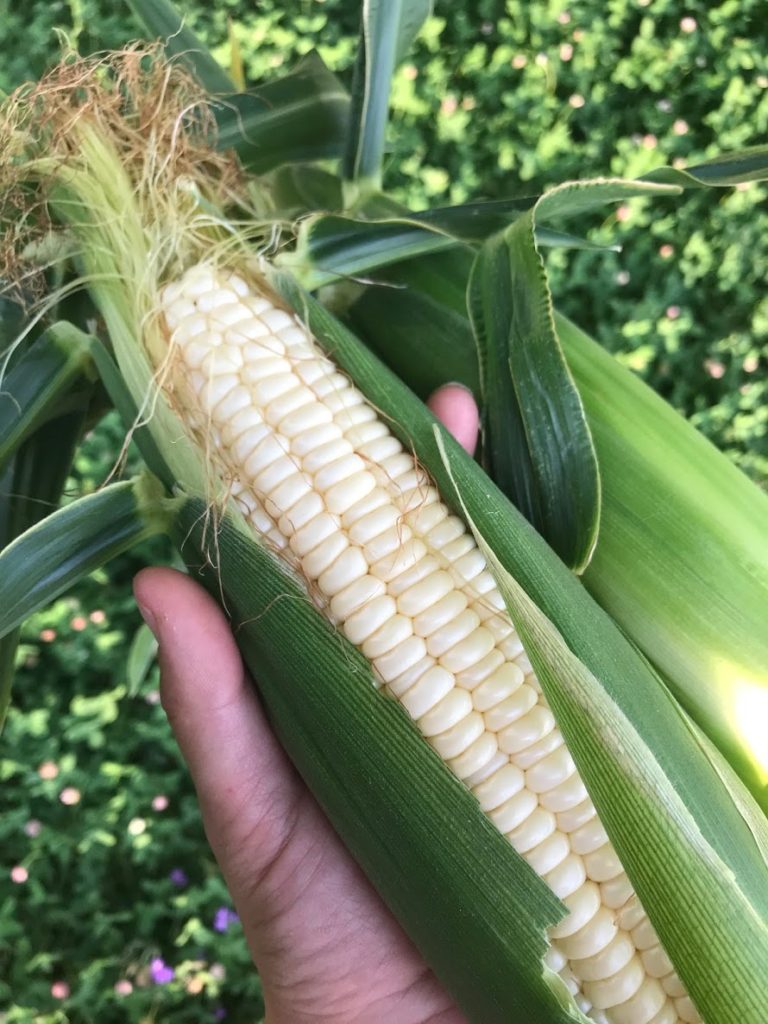
Sweetcorn has the highest sugar content of any of the varieties and is comprised mostly of soft starches. It is the most frequently grown corn by home gardeners.

Dent Corn

Dent corn is mostly commercial corn. It is grown for animal fodder, high fructose corn syrup, ethanol, and tortilla chips. This variety is a cross between flint and flour corn. It is called dent corn because of the dented appearance. It can be roasted in the milk stage (18-22 days after corn silk appears) for eating.

Flour Corn

Flour corn is a soft starch. It is sweet and digestible, with a fuller flavor than sweet corn. It can be eaten like fresh corn in the milk stage. It is good for masa.

Popcorn

Popcorn is a subset of flint corn-unlike sweet corn and does not shrivel when it is dried. This is because the outer starch is hard while the inner starch is soft. When heat is applied, there is a pressure that builds up causing that soft starch to pop. Popcorn has a prickly appearance. Don’t grow for table eating.

Flint Corn

Flint and flour are the traditional Native American corns. Flint is used for hominy, grits, cornmeal and can be popped. They have an iridescent glass bead look. Only a few varieties can be used for fresh eating, and are often roasted.

Here are some suggested varieties to try for monsoon garden crops:

CORN

Ashworth Corn [Sweet]. Plant later in the season, mid August or early September. This variety is quick maturing approximately 70 days and is a shorter variety at 5ft tall.

Dia De San Juan [Dent]. Planted out June 24th to welcome the expected rains. Good for tamales, masa and roasted eating. Grows 10ft tall.

Yoeme Blue Corn [Flour]. A very heat tolerant variety good for low elevations. Shorter variety.

Onaveno [Flint]. A very tall variety that is late maturing and endures temperatures well over 100 degrees. Plant this if you have a good amount of space to dedicate to a corn patch.

Glass gem [Popcorn]. A very beautiful and colorful variety. Plants grow 6ft tall.

COWPEAS AND BEANS

Holstein cowpea. A prolific producer or mottled black and white beans. Smaller plants that are perfect for container or small space gardens.

Blue goose. This variety is best described as tiny speckled rocks! They produced very long pods with about 20 seeds per pod on 3 foot tall plants.

Arsin Long Bean. A very prolific long bean that produces well into winter. Grow this one with a tall variety of corn.

Yoeme Purple String Bean. A quick maturing pole bean that takes 75 days from pod set to a dry bean in Phoenix.

Hopi Red Lima.  A beautiful bean that produces a prolific number of pods. They do take a very long time to mature but are well worth the wait. Plant in late May or early June.

SQUASHES AND MELONS

Zucchini. Any zucchini will grow well with short corn or in container planting.

Calabaza Mexicana. A vigorous cushaw squash with a pale colored flesh.

Magdalena Big Cheese. Large sweet-fleshed squash variety. It is an excellent producer and looks great for Halloween and Fall decorations.

Hopi Yellow Watermelon. This variety is really attractive with its lovely creamy yellow flesh and black seeds. Sweet crisp flesh.

Crimson Sweet watermelon. A popular variety with a lovely sweet and juicy flesh.

Kajari melon. Very heat tolerant small-fruited musk melon with a strong scent. Beautiful orange striped melons very popular with backyard gardeners.

We recommend reading our article on growing squash for information on varieties and understanding cross-pollination.

Category: News & Stories, Tips and Tricks

Growing Clover as a Lawn Alternative

June 3, 2019 //  by jessica.m.ricco@gmail.com//  9 Comments

[vc_row css=”.vc_custom_1559602503825{padding-bottom: 5% !important;}”][vc_column][vc_custom_heading text=”Vast expanses of green lawns get a bad rep sometimes among backyard food and fruit growers as everything from a waste of space to a waste of resources. But what if you could have a nice patch or path or border of soft, fluffy greenery that thrives in summer and winter?” font_container=”tag:p|font_size:18|text_align:left” use_theme_fonts=”yes”][vc_custom_heading text=”Clover is a fantastic option for so many reasons – it is a nitrogen fixer, it flowers for bees, it has deep roots that sustain it without daily watering, it stays green in the winter, among others. We love to run around barefoot on this soft green patch in our yard.” font_container=”tag:p|font_size:18|text_align:left” use_theme_fonts=”yes”][/vc_column][/vc_row][vc_row css=”.vc_custom_1557978178312{padding-bottom: 5% !important;}”][vc_column width=”1/3″][vc_custom_heading text=”PALESTINE STRAWBERRY CLOVER” font_container=”tag:p|font_size:24|text_align:left|line_height:1.5″ use_theme_fonts=”yes”][vc_single_image image=”1208″][vc_custom_heading text=”We came upon Palestine Strawberry Clover when researching a low ground cover that would be suitable for the bare earth along the edge of our yard that was previously a flood irrigation channel.” font_container=”tag:p|text_align:left|line_height:1.5″ use_theme_fonts=”yes”][/vc_column][vc_column width=”2/3″][vc_single_image image=”2971″ img_size=”full”][/vc_column][/vc_row][vc_row css=”.vc_custom_1559602525768{padding-bottom: 5% !important;}”][vc_column][vc_custom_heading text=”This particular variety stood out because it:” font_container=”tag:p|font_size:24|text_align:left|line_height:1.5″ use_theme_fonts=”yes”][/vc_column][/vc_row][vc_row css=”.vc_custom_1557980198386{padding-bottom: 5% !important;}”][vc_column][vc_row_inner css=”.vc_custom_1559602546841{padding-bottom: 3% !important;}”][vc_column_inner width=”1/3″][vc_custom_heading text=”TOLERATES POOR DRAINAGE” font_container=”tag:p|font_size:18|text_align:left|line_height:1.5″ use_theme_fonts=”yes”][vc_single_image image=”1208″][vc_custom_heading text=”It tolerates poor drainage and can survive in up to two months of flooding.” font_container=”tag:p|text_align:left|line_height:1.5″ use_theme_fonts=”yes” link=”|||”][/vc_column_inner][vc_column_inner width=”1/3″][vc_custom_heading text=”ATTRACTS BENEFICIAL INSECTS” font_container=”tag:p|font_size:18|text_align:left|line_height:1.5″ use_theme_fonts=”yes”][vc_single_image image=”1208″][vc_custom_heading text=”The strawberry clover blossoms attract bees, butterflies, and other beneficial insects, particularly during the summer after the citrus blooms have faded.” font_container=”tag:p|text_align:left|line_height:1.5″ use_theme_fonts=”yes” link=”|||”][/vc_column_inner][vc_column_inner width=”1/3″][vc_custom_heading text=”FIXES NITROGEN” font_container=”tag:p|font_size:18|text_align:left|line_height:1.5″ use_theme_fonts=”yes”][vc_single_image image=”1208″][vc_custom_heading text=”All clover fixes nitrogen, so this is not something unique to this variety. However, this is a major benefit of clover to traditional bermuda or rye grass.” font_container=”tag:p|text_align:left|line_height:1.5″ use_theme_fonts=”yes” link=”|||”][/vc_column_inner][/vc_row_inner][vc_row_inner css=”.vc_custom_1559602561000{padding-bottom: 3% !important;}”][vc_column_inner width=”1/3″][vc_custom_heading text=”TOLERATES MOWING AND GRAZING” font_container=”tag:p|font_size:18|text_align:left|line_height:1.5″ use_theme_fonts=”yes”][vc_single_image image=”1208″][vc_custom_heading text=”This clover looks lovely after being mowed, if you plan to replace a lawn. It stays green and soft underfoot.” font_container=”tag:p|text_align:left|line_height:1.5″ use_theme_fonts=”yes” link=”|||”][/vc_column_inner][vc_column_inner width=”1/3″][vc_custom_heading text=”SPREADS, BUT NOT INVASIVE” font_container=”tag:p|font_size:18|text_align:left|line_height:1.5″ use_theme_fonts=”yes”][vc_single_image image=”1208″][vc_custom_heading text=”Our clover has filled out the surrounding areas nicely but is nowhere near as invasive as bermuda grass. If I could replace our entire lawn (which was existing when we moved in) with this clover, I would. We are constantly pulling bermuda grass out of garden beds and from mulched areas.” font_container=”tag:p|text_align:left|line_height:1.5″ use_theme_fonts=”yes” link=”|||”][/vc_column_inner][vc_column_inner width=”1/3″][vc_custom_heading text=”LOOSENS HEAVY SOIL” font_container=”tag:p|font_size:18|text_align:left|line_height:1.5″ use_theme_fonts=”yes”][vc_single_image image=”1208″][vc_custom_heading text=”This is BIG for the low desert. Our compacted clay soil needs help to allow oxygen and water to permeate to plant roots. This clover has deep roots that loosens soil and also improves its own drought tolerance.” font_container=”tag:p|text_align:left|line_height:1.5″ use_theme_fonts=”yes” link=”|||”][/vc_column_inner][/vc_row_inner][vc_row_inner css=”.vc_custom_1559602571721{padding-bottom: 3% !important;}”][vc_column_inner width=”1/3″][vc_custom_heading text=”HEAT TOLERANT” font_container=”tag:p|font_size:18|text_align:left|line_height:1.5″ use_theme_fonts=”yes”][vc_single_image image=”1208″][vc_custom_heading text=”It thrives in the summer and winter (hardy down to 25). It does need some water in the summer. However, now that it is established in our yard, it only receives flood irrigation every 2 weeks and receives full western sun.” font_container=”tag:p|text_align:left|line_height:1.5″ use_theme_fonts=”yes” link=”|||”][/vc_column_inner][vc_column_inner width=”1/3″][vc_custom_heading text=”ALKALI TOLERANT” font_container=”tag:p|font_size:18|text_align:left|line_height:1.5″ use_theme_fonts=”yes”][vc_single_image image=”1208″][vc_custom_heading text=”This clover is advertised as alkali tolerant and certainly has thrived wherever we’ve planted it. It even grows along the salty banks of tidal streams.” font_container=”tag:p|text_align:left|line_height:1.5″ use_theme_fonts=”yes” link=”|||”][/vc_column_inner][vc_column_inner width=”1/3″][vc_custom_heading text=”GREEN ALL YEAR LONG” font_container=”tag:p|font_size:18|text_align:left|line_height:1.5″ use_theme_fonts=”yes”][vc_single_image image=”1208″][vc_custom_heading text=”I love that it maintains its rich green color all year long. Bermuda grass always looks so sad and brown in the winter and overseeding with rye is not something we are willing to do at this point.” font_container=”tag:p|text_align:left|line_height:1.5″ use_theme_fonts=”yes” link=”|||”][/vc_column_inner][/vc_row_inner][/vc_column][/vc_row][vc_row css=”.vc_custom_1559602525768{padding-bottom: 5% !important;}”][vc_column][vc_custom_heading text=”How to Start Clover From Seed” font_container=”tag:h3|font_size:24|text_align:left|line_height:1.5″ use_theme_fonts=”yes”][vc_single_image image=”1208″][vc_column_text]We planted this clover in October a couple of years ago.

You need to inoculate clover seed prior to planting. The seed we purchased came pre-coated so we did not have to worry about this step. Inoculation ensures good germination.

I spread the seed using a hand-held seed spreader, but if you have a larger area to cover, the wheeled ones are definitely a better option.

I spread the seed the day after we received flood irrigation because the ground would already be soaked. I also wanted the seeds to germinate before we received flood again, which would have washed away the seed. If you don’t receive flood, you might want to wet the area first.

After spreading the seed, I covered (lightly) with a mix of wood chips, soil, and grass clippings. In retrospect, the grass clippings might not have been the best choice because bermuda and other grasses spread so quickly. However, we didn’t seem to have a huge problem with grass out-competing the clover. I believe starting it in the fall, when bermuda is entering dormancy, was the key to helping the clover become established so it can crowd out the bermuda.

I used a simple, inexpensive sprinkler hooked up to the hose on a timer to keep the area moist for about 10 days.

This clover has reseeded itself and spread to create a beautiful border to our existing lawn. We mow the edge of it and it creates a really nice transition against the block wall that crowds out weeds and provides food for beneficial insects.[/vc_column_text][/vc_column][/vc_row][vc_row][vc_column][vc_cta h2=”Buy Clover Seeds” add_button=”left” btn_title=”Buy Clover Seed” btn_color=”green” btn_link=”url:https%3A%2F%2Fwww.groworganic.com%2Fpalestine-strawberry-clover-rhizocoated-lb.html||target:%20_blank|”]If you’d like to buy Palestine Strawberry clover from the same place we did, consider Peaceful Valley Farm Supply![/vc_cta][/vc_column][/vc_row]
Category: News & Stories, Tips and Tricks

Copyright © 2026 ss_site_title · All Rights Reserved · Powered by Mai Theme